Are you wondering how to create an exit popup or simply want to know what is it? In this short article, I will guide you through every step to create and launch your own exit-intent popup in WordPress.
What is an Exit-Intent Popup?
An exit-intent popup is a modal window that appears to site visitors if they are trying to leave a page. The goal of an exit-intent popup is to prevent users from leaving your site or take action by leaving their contact information.
The popup can contain anything (usually in a form of Call-to-Action) from promotional discounts to subscription forms - it is up to you to decide - whatever your goal is.
Although exit-intent popups seem to be really annoying, they are considered as one of the most efficient digital marketing instruments. Some well-made popups get as much as a 33% conversion rate (talking about lead capturing).
Exit-Intent Popups for WordPress
With WordPress at your fingertips, there is a plugin for everything. And, when it comes to popups, there is even more.
Because of its popularity, most popup builders are fully compatible with WordPress. This means that you can choose from a wide variety of great tools to create popups for your site.
Some of the tools to consider are Sumo, JustUno, OptinMonster, and Visual Composer Popup Builder.
Whatever your choice is, there are few things to consider.
The first one is the display limit, as you don't want to find out that your popups stopped working because you've reached your limit.
The second, design freedom to create popups you want. Some tools get lots of limitations when it comes to designing a popup.
The third is the price. There are zero reasons to overpay for the tool you can get for a competitive price and still satisfy all your needs.
How to Create an Exit-Intent Popup in WordPress
In this chapter, I will use Visual Composer Popup Builder as an example of how you can quickly get your popups up and running.
Before we jump into the process, there are few things to know about Visual Composer Popup Builder:
- There are no limits on the number of popups or display limits;
- There is total design freedom as you will design popups in the visual editor;
- The Popup Builder comes completely free of charge for everyone with a Visual Composer Premium subscription.
It is time to create your first exit-intent popup.
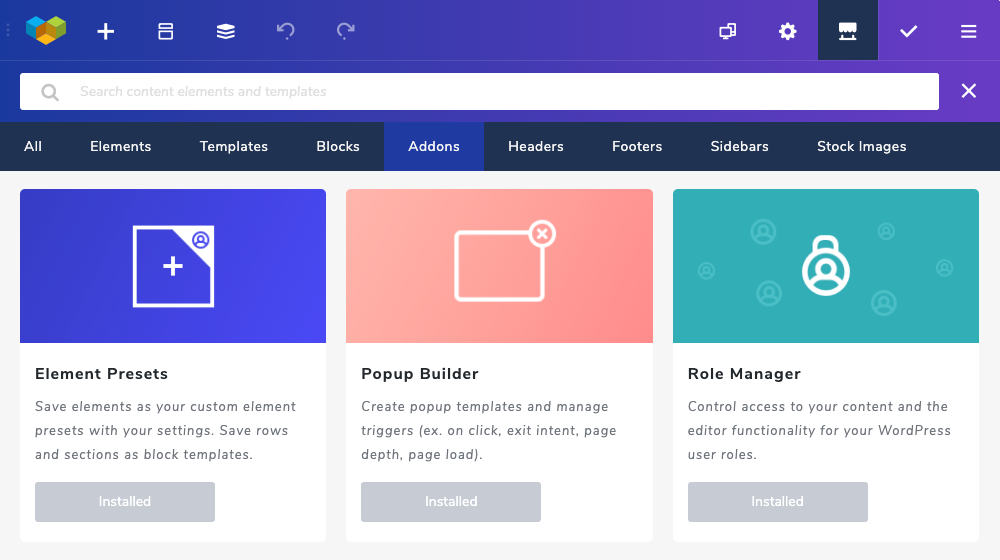
The first thing you need to do is simply open Visual Composer Hub and download Popup Builder extension from the Addons section.
For those new to the Visual Composer Hub, it is a cloud library available to Visual Composer users to download extra content and functionality, like elements, templates, add-ons, and stock images.
Once downloaded, the Popup Builder will be automatically installed.
The core idea behind Visual Composer Popup Builder is that you can create an unlimited number of popup design templates and then activate triggers, like page load, click, or exit-intent by choosing the popup you have created.
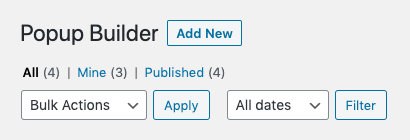
To access the popup builder, go back to your WordPress Admin Dashboard and navigate to Visual Composer - Popup Builder.
Now, simply click on Add New and you will be instantly redirected to the Visual Composer Frontend editor to design your popups.
Once in the Popup Builder, the first thing to do is give your new popup a meaningful name. The popup name will be displayed in the drop-down menu once you will choose a popup to be triggered for the exit-intent action.
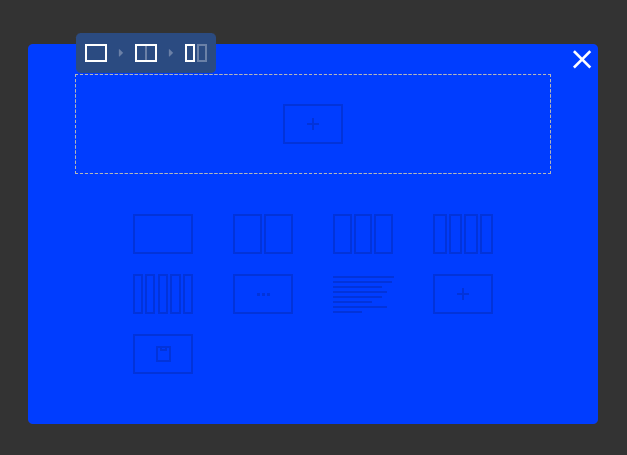
As you proceed, you will see a drag and drop interface with popup container already added by default.
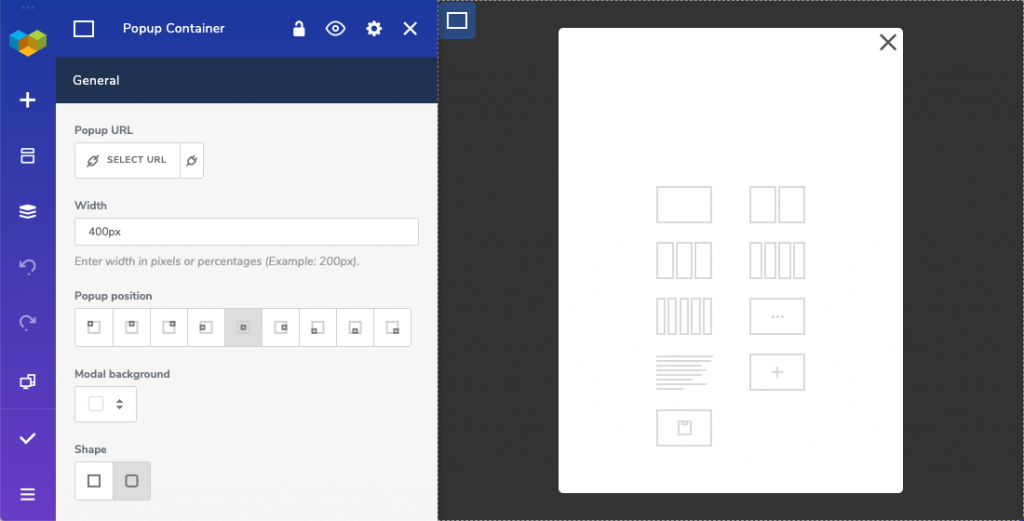
A popup container is the root element of your modal window that allows you to quickly adjust the appearance of your popup window. From there, you can control width, background, close buttons, and even overlay.
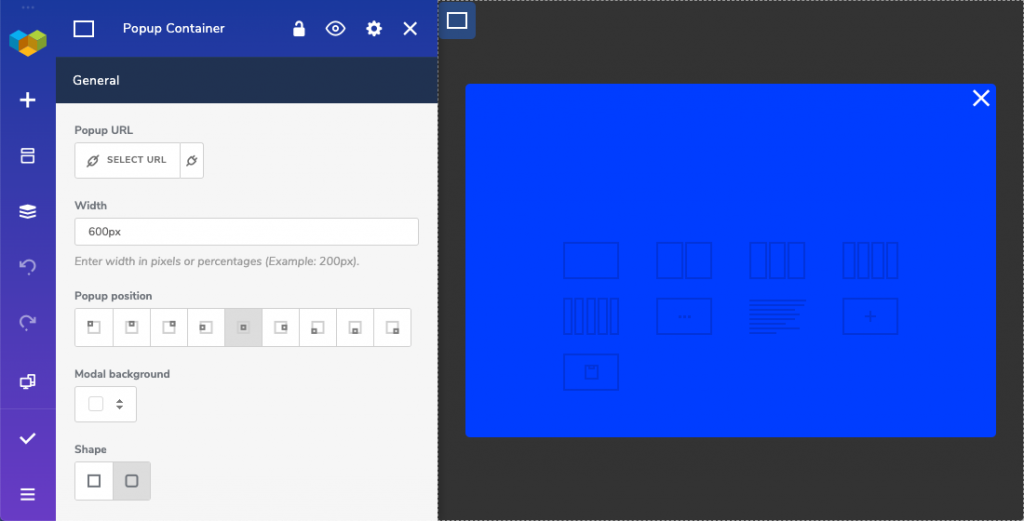
Let's start by adding some colors to our popup. For that, in the Popup Container window on the left, navigate down to Design Options and set a background color. I will choose blue.
As you can see, the close button with the default color is not visible. In such a case, it is a good idea to make it white.
Plus, I would like to have my popup window wider so I will set it to 600px. A cool thing about popup width is that you can also use percentage - this means your popup width will be calculated from the screen size.
Now we have our popup window styled and it's time to add some content.
You can use any element available in Visual Composer and add it to your popup window. Make sure to check out Visual Composer Hub for various elements.
Let's say that we want to offer our site visitors a special discount upon leaving the site. For that, we will use simple elements - text block and button.
Take note, just like in Visual Composer Website Builder, the popup builder uses row and column element logic to arrange elements into rows and columns.
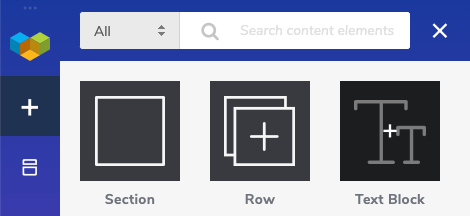
In the Popup Builder, there is a row and column added to the Popup Builder by default already. To add a text block, simply click on the add sign in the navigation bar on the left or directly in the row of your layout.
You will see an element window where you should choose the Text Block.
With the text block added, you can adjust the copy of your message and style it by using WordPress default TinyMCE editor.
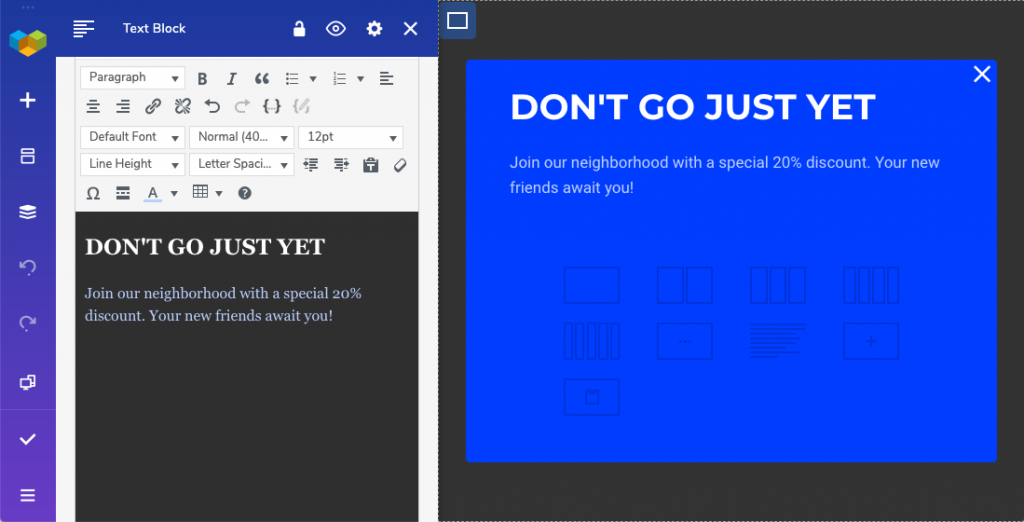
With the copy ready, let's add a button just below our message. Hover the text block with your mouse and click on the plus sign just below. In the element window, locate Basic Button and click add.
With this action, we specify that we want to add a new element in the same row just after the text.
If you want to add a button to another row, you can do so by clicking on the icons below which will add a new row with one or several columns and then add an element there.
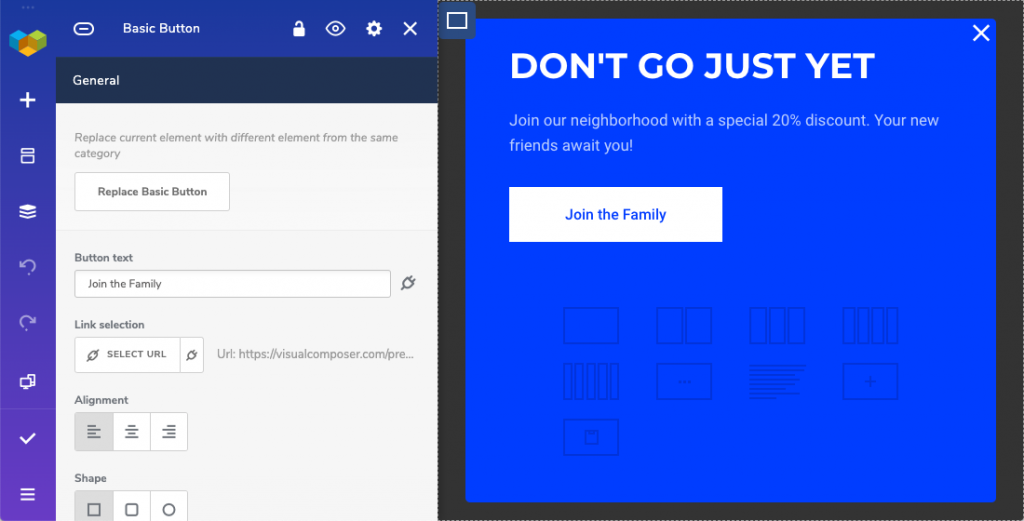
Our button is added, but it requires some styling. Update the title, choose your button color, and add a link where you want to lead your visitor.
While adding a text and a button is the base of the popup, a good practice is to also add an image to make the popup stand out more. Visual Composer allows adding images anywhere in the popup but in this case, I'd like it to be on the right side of the text and the button.
To do that, we'll first have to add a second column to this row. To do that, open the edit window the row where we already have all of our content and under the Row Layout section, you can choose the layout with two equal-sized columns.
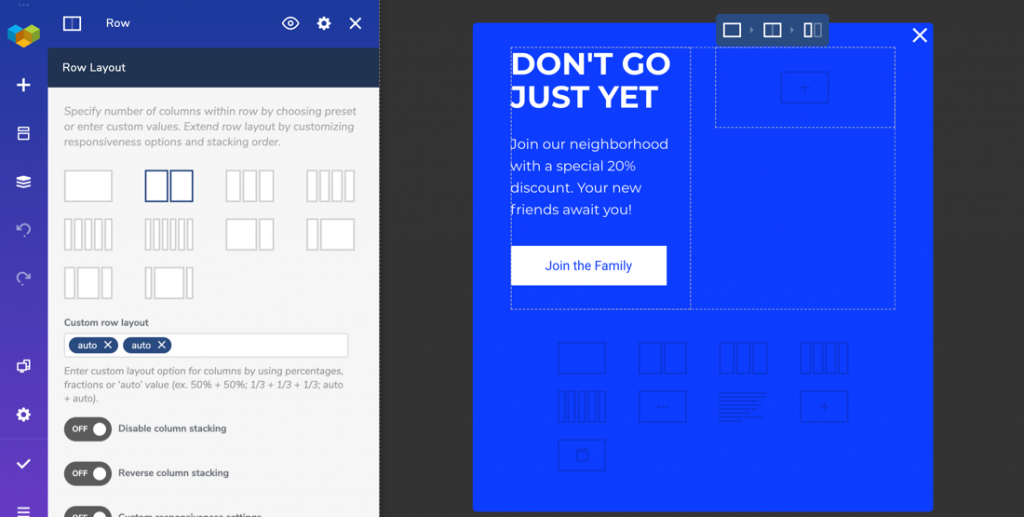
Then to add an image, the process is the same as with the Tex Block before. Simply click on the plus icon and choose Single Image from the Element Library, that popped up on the left side.
Now we can add the image we want, by deleting the default image and choosing from the Media Library. And that's it! Hit on Save, and our popup is ready!
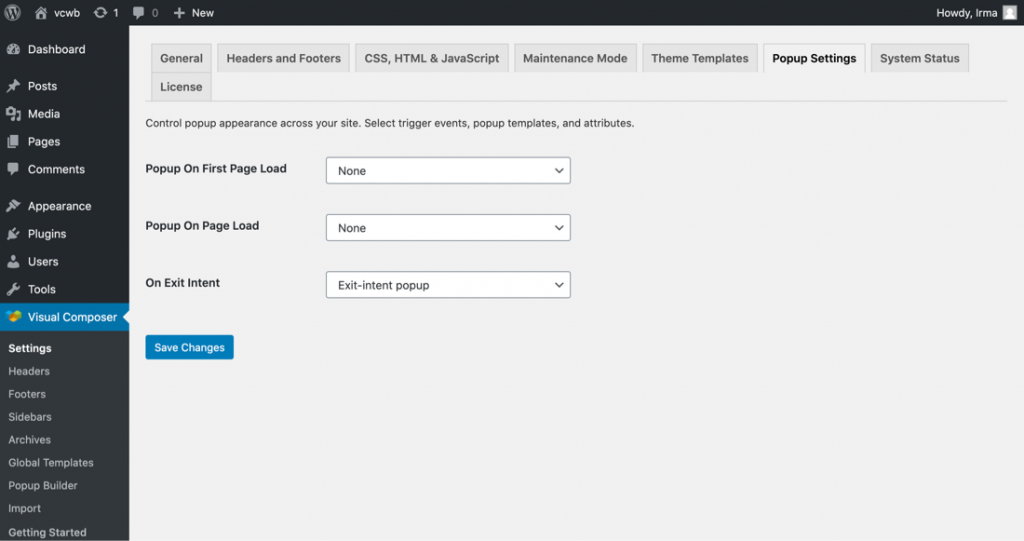
The last step is adding it to your website. There are two ways to go around this. You can either make the popup show up on the whole site or just on a specific page.
To display the popup we just made on the whole website, open your WordPress dashboard, locate Visual Composer in the left side menu, and click on Settings. There you'll find the Popup Settings tab. Specify the exit-intent popup simply by choosing it from the dropdown and don't forget to save the changes.
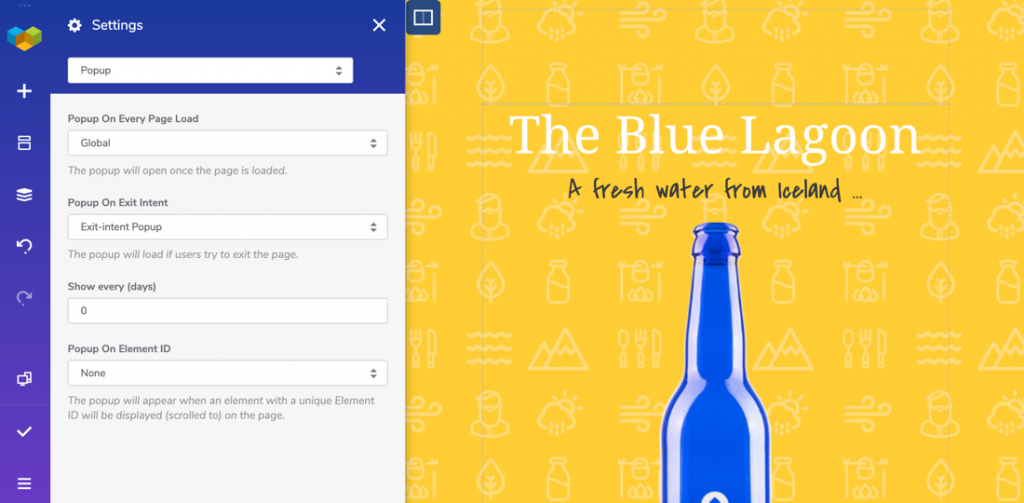
If you want to trigger the popup on a specific page, you'll have to open that page and in the frontend editor go to the On-Page Settings, that you can find in the navigation bar. There choose Popup from the dropdown and on the “On exit intent” section choose the popup you made.
Hit save now the popup will be triggered once a person tries to exit this specific page.
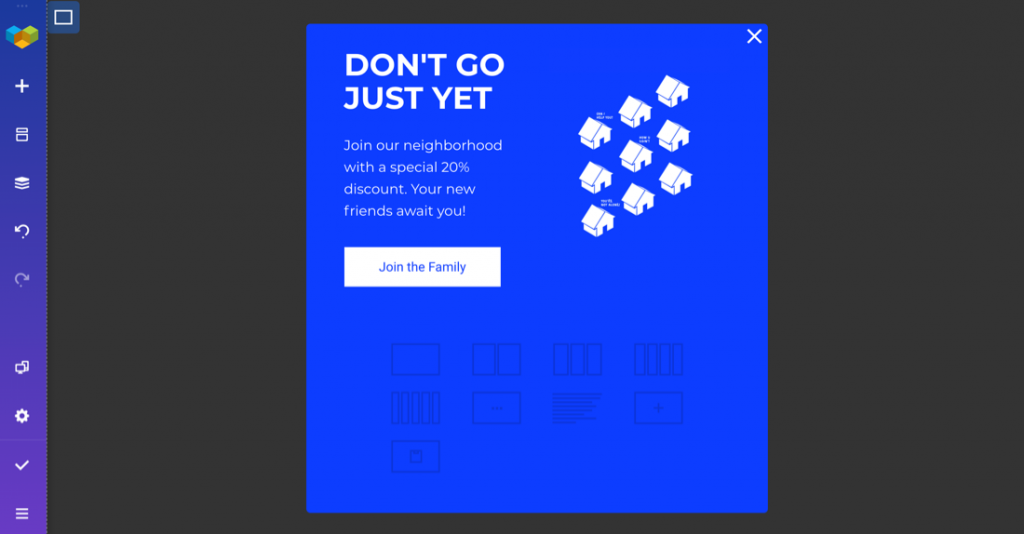
When everything is done and you're happy with the result, this is how the popup will look for the visitor.
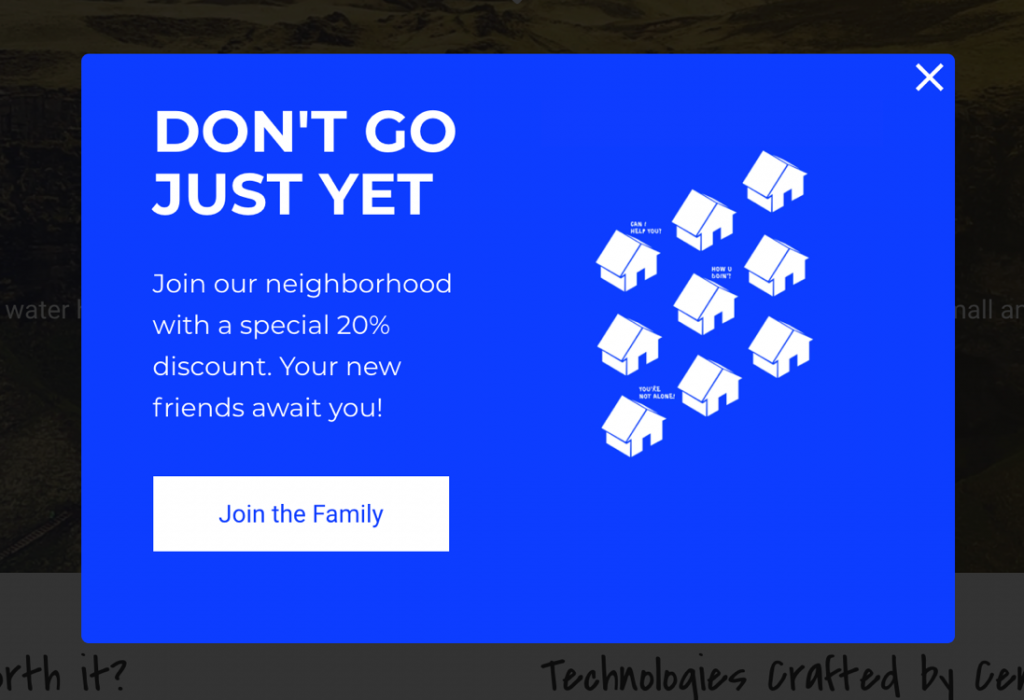
It's just like in the frontend editor. Simple yet effective.
Conclusion
Now you can be sure, that creating a popup doesn't have to take up much of your time. It can be as little as a catchy text, simple button, and an interesting image. But it doesn't have to stop there. You can always make the popup as complex as you wish and Visual Composer has the tools to support all of your crazy ideas.
So in short, exit-intent popups are an essential marketing tool, and making them with Visual Composer is fast and easy.

Will be having a look at these and giving them a try keep up the great work
Thanks! Please let us know what you think is missing and what you like the most about it.