Building a multilingual site on WordPress doesn’t have to be complicated. By using Visual Composer together with TranslatePress multilingual plugin you will be able to easily create and translate your site into multiple languages.
The two plugins are fully compatible, so you can use TranslatePress to translate any type of element or template available in Visual Composer, directly from the front-end and instantly see the translation. All using an intuitive visual translation interface.
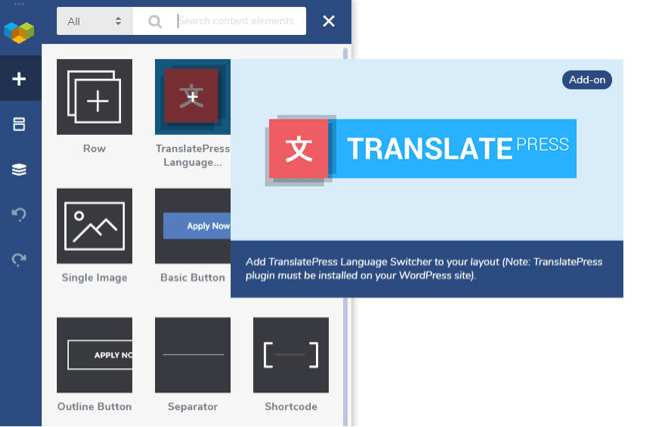
We went even further and worked together to add a TranslatePress - Language Switcher element inside the Visual Composer editor. Once you download it from the Visual Composer Hub, you can use the drag and drop editor to place it anywhere on your page and customize it.
In this tutorial we’ll go through the simple steps required to build a multilingual site using Visual Composer together with TranslatePress.
Why Build A Multilingual Site In The First Place?
The most important thing would be extending your reach. With a multilingual site that’s set up right, reaching an international audience that speaks multiple languages is easy.
If you run a business that can serve potential clients from all around the world, it makes a lot of sense to go multilingual.
Whether you are a tourism agency or hotel, an online shop, a company that is looking to extend their business to international markets, or simply live in a country with more than one official language (like Canada or Switzerland), going multilingual will positively impact your business.
Reaching more people and presenting the content in their own language can have a significant impact on your website traffic and revenue.
If any of the examples above resonate with your situation, you should consider translating your website into multiple languages.
Building A Multilingual Site Using Visual Composer And TranslatePress
Let’s dive into how to translate your site built with Visual Composer by using TranslatePress.
For this tutorial I will start with a predefined Visual Composer template that already contains quite a few elements and content.
This is how the page looks like after loading the seafood restaurant template, available in the Visual Composer Hub.
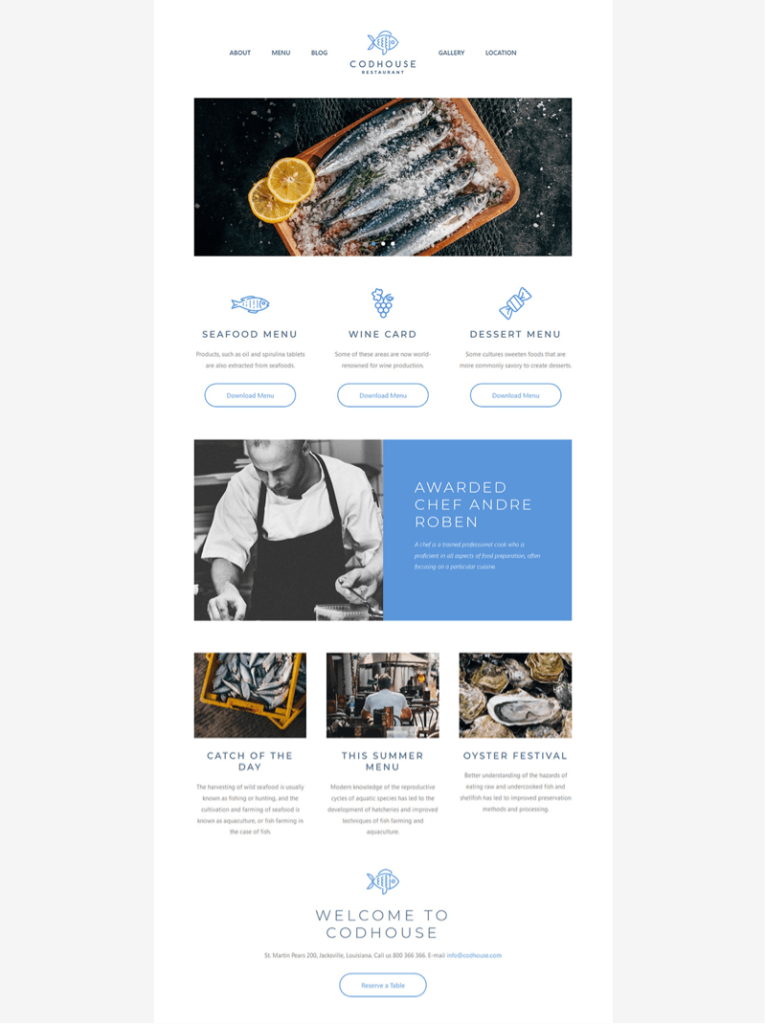
You can use the visual drag & drop editor to add elements and templates, in order to create the remaining pages of your soon to be multilingual website.
Translate Your Visual Composer Site Into Multiple Languages
Now that we have our page ready, let’s see how to translate the entire content using TranslatePress visual translation editor.
Adding A Second Language To Your Site
First we need to install and activate TranslatePress. The multilingual plugin comes in both a free and premium version.
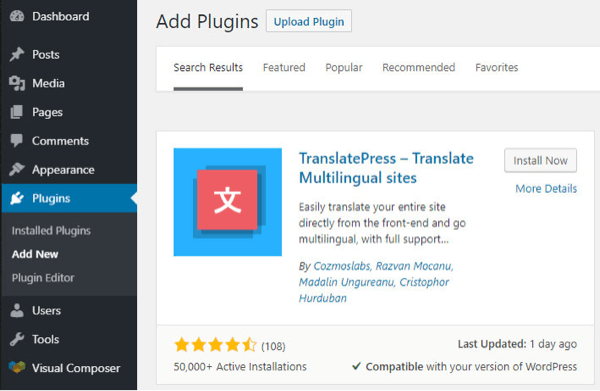
To install the free version of TranslatePress, simply go to Plugins - Add New and type “TranslatePress” in the search form. Then select, install and activate it just like any other WordPress plugin.
The premium version of TranslatePress includes multiple add-ons which allow you to add unlimited translation languages, boost your multilingual SEO, automatically detect a visitor’s language, create translator accounts, display different menu items for different languages and more. It covers all the advanced needs of a multilingual website.
Once TranslatePress is installed and activated, navigate to Settings > TranslatePress to set up the plugin.
The first thing you’ll notice are the translation languages you want to make your website available in.
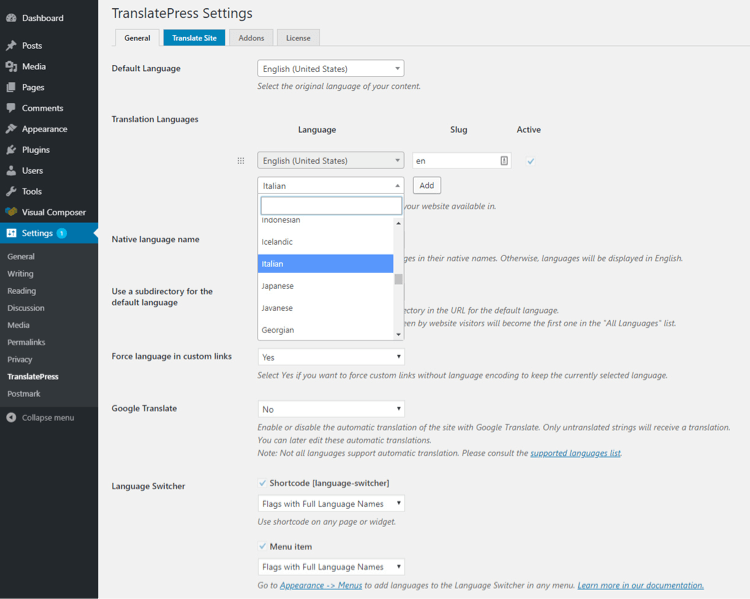
English is our default language, and I will also add “Italian” for this tutorial.
There are a few other settings (like Google Translate integration for automatic translation), but we can skip them for now and click “Save Changes”.
Translating Your Page Content Using TranslatePress
We are now ready to translate our website content using TranslatePress visual translation editor.
To start translating the page into “Italian”, you can either click the “Translate Site” blue tab under TranslatePress settings page or just navigate to the page you want to translate in the front-end and click the “Translate Page” item from the admin bar menu (located next to ”Edit with Visual Composer”).

Clicking it will open up the front-end visual translation editor. Now all you need to do is hover over a certain text or element you want to translate (you will notice a pencil icon appearing), then click it and insert the translation.
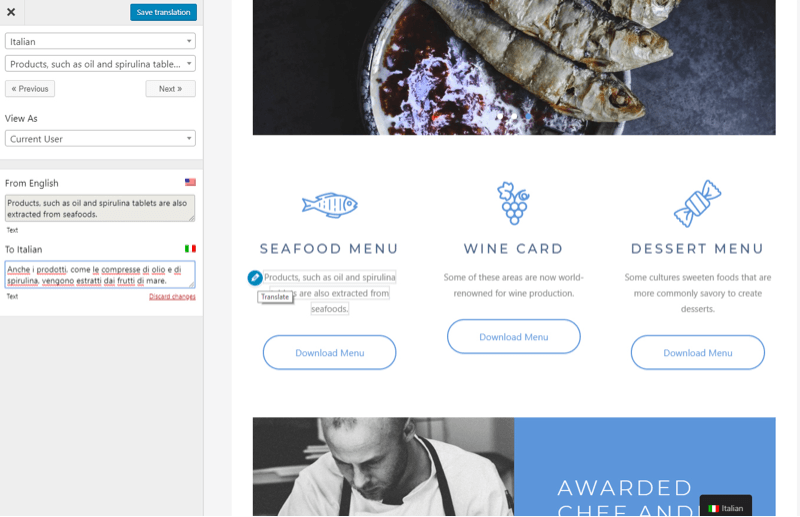
Then hit “Save translation” and notice how the text will update in the editor in real time. It’s that simple.
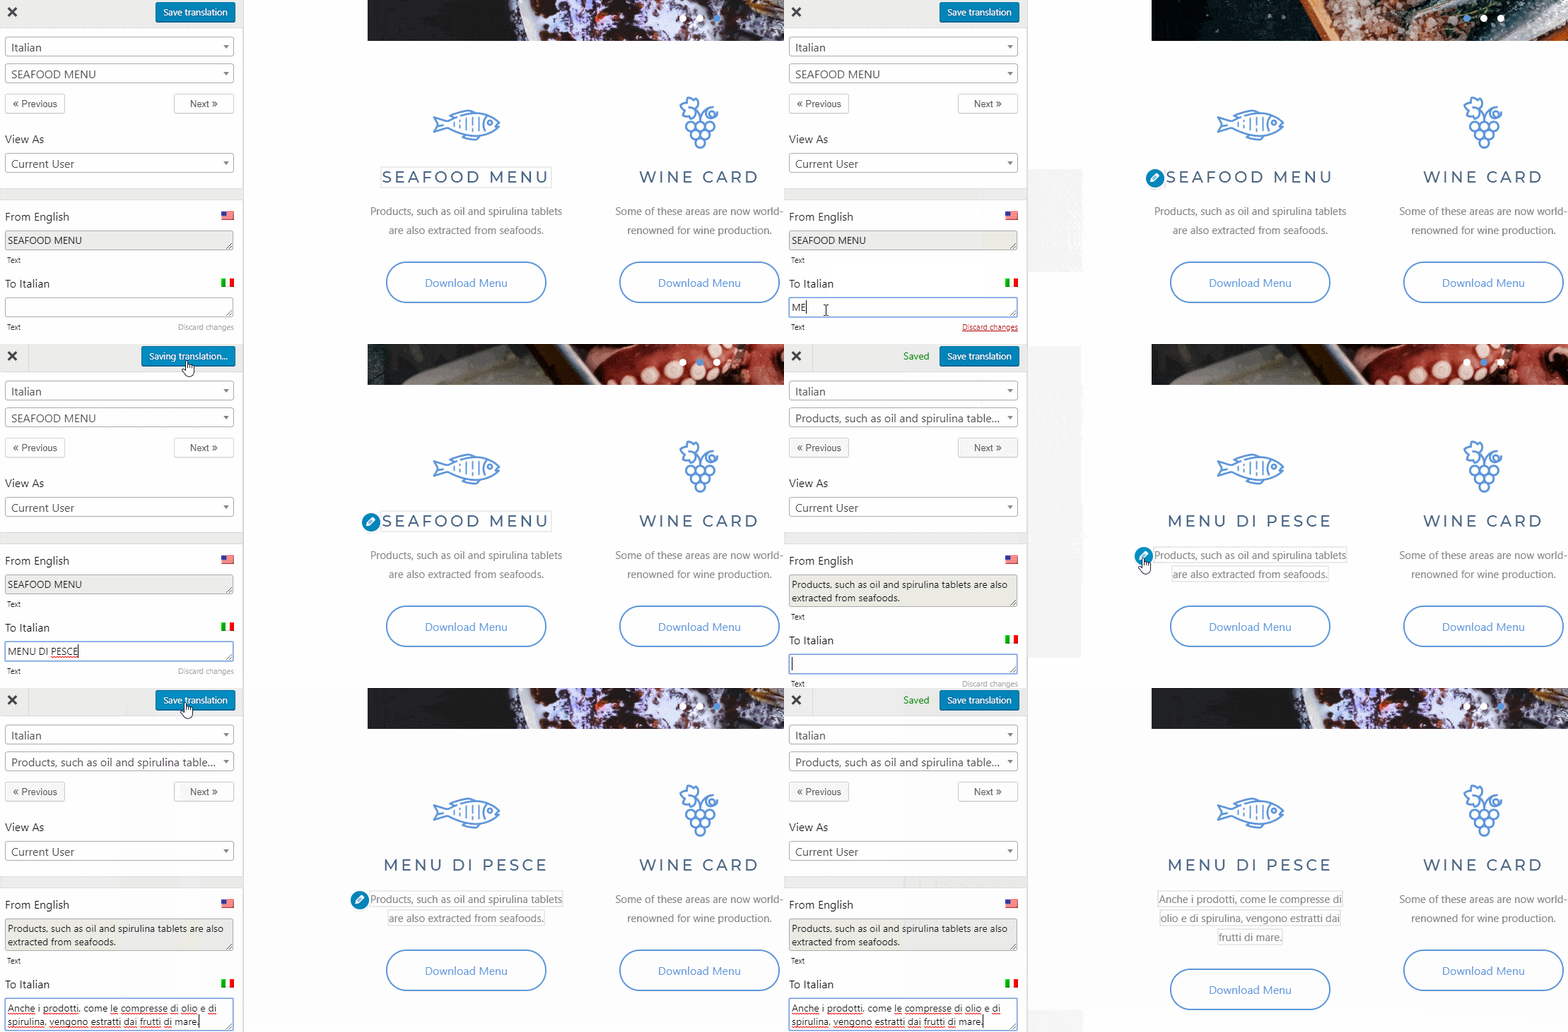
All you have to do now is to repeat the same process for all the content elements on your page.
The visual translation process is similar whether you translate a menu item, a form, button text or an image containing text.
WooCommerce products can also be easily translated with TranslatePress.
You can use the following keyboard shortcuts to speed up the process:
- CTRL ( ⌘ ) + S - Save current string.
- CTRL ( ⌘ ) + ALT + Z - Undo changes applied to current string.
- CTRL ( ⌘ ) + ALT + → - Edit next string.
- CTRL ( ⌘ ) + ALT + ← - Edit previous string.
Adding A Language Switcher To Your Website
A language switcher is a key component of a multilingual site. It allows visitors to navigate the site in their own language.
Using the TranslatePress - Language Switcher element from Visual Composer, you can use the drag and drop editor and place it anywhere on your site.
By downloading it from the Visual Composer Hub, the language switcher element will appear under “Add Element” menu inside the Visual Composer editor. You can customize the looks of the language switcher from the element properties.
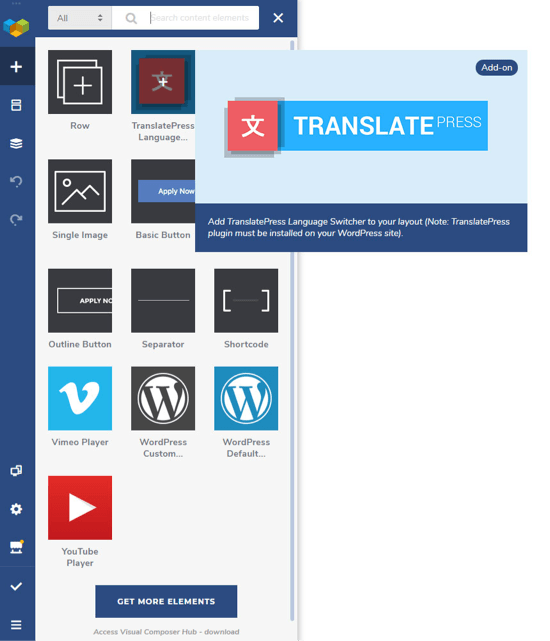
Simply drag and place it wherever you want on your site. In our sample, we will add it to the navigation menu.

You can customize the looks of the language switcher, by choosing from different display options.
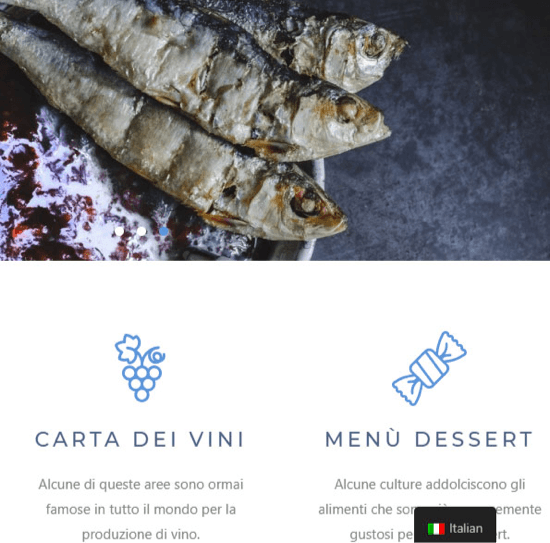
Another thing TranslatePress does by default (once you added a secondary language) is automatically add a floating language selection dropdown that follows the user on every page. Once you hover over it, it will display all the available languages.
Translating The Rest Of Your Visual Composer Website
As you may have noticed by now, translating Visual Composer sites using TranslatePress is really intuitive and fast. Once you have added a secondary language, you can start translating your entire site exactly as it looks in the front-end.
To translate the rest of your website simply navigate it page by page using the visual translation editor, select a certain text or element, then enter its translation. Save and move to the next one. You will have all your website content translated in no time.
Benefits Of TranslatePress
- Intuitive visual translation interface, allows you to see changes in real-time;
- It is fast. It won’t slow down your site;
- SEO friendly (easily translate page slugs, title, description, and create multilingual sitemaps);
- Detects and can modify dynamic strings added by WordPress, themes, and plugins;
- Works with any theme or plugin, including WooCommerce and site builders;
- Offers an automatic translation by using Google Translate.
To put it simply, TranslatePress uses the same visual approach to translating content that Visual Composer has for building websites. You translate what you see, and clearly understand the context.
