How cool would it be to have a huge collection of high-resolution photos that you can access to find the perfect image for your website? And how great would it be if that collection was totally free – like a personal resource to tap into whenever you like?
It would be amazing, right?
Well, Unsplash is that resource. In this post, we’ll tell you all about Unsplash. Then show you, step-by-step, how to find and add stunning photos to your site. From top to bottom, we’ll cover:
- What Unsplash is;
- Why you should use Unsplash;
- The Unsplash Licence;
- How to add Unsplash Images to your website manually;
- How to add Unsplash Images to your website with a plugin;
- How to add Unsplash Images to your website with the Visual Composer and Unsplash integration.
Before we get into all of that good stuff, though, let’s talk about why images are so important to your content.
The Difference an Image can Make
We’ve all heard the old adage, ‘a picture is worth a thousand words.’ It's about as cliche as cliches come. But like many cliches, it’s true – an image can convey a message or meaning more effectively than words do.
That’s not to say you should abandon words in favor of images. Copy and audio can be powerful tools. However, when it comes to getting your content to stick in the mind of the viewer, nothing beats visuals.
According to molecular biologist John Medina, when we hear information, we’re only likely to remember 10% of it three days later. Add an image to that information and we remember 65% of it.
That’s why images perform so well as a content marketing tool. Check out these statistics from marketer Larry Kim:
- Posts that include images produce 650% higher engagement than text-only posts;
- Articles with images get 94% more views;
- Facebook posts from brands that included images earn 87% of all engagements;
- Tweets with images get up to 18% more clicks, 89% more favourites, and 150% more retweets;
- 51% of B2B marketers prioritise creating visual assets as part of their content marketing strategy.
There are dozens of more stats we could throw at you, but you get the point: images are great. And Unsplash is the best place to find them.
What is Unsplash?
Unsplash is a platform where photographers can share high-resolution images and make them freely available for commercial use.
Co-founder Mikael Cho explains how the platform came to be in a post on the Unsplash blog:
"It began as a Tumblr blog with ten photos we had leftover from a photoshoot. Instead of letting our photos sit dead in a hard drive somewhere, we thought it would be better if they were put to use to move other creative projects forward. A freelance designer could grab an image to pitch a mockup or demo. An entrepreneur strapped for cash could put a website up with a nice background photo to attract potential customers.
We believed the good from giving our images away would far outweigh what we could earn if we required payment or credit."
That was back in 2013. Today, Unsplash has over 1.2 million photos available, which receive over 13 billion photo views and 64 million photo downloads a month.
Every month, a community of over 158,000 photographers uploads more than 65,000 photos across multiple categories, from fashion and nature to business and experimental. And the exposure they get far surpasses what’s possible on social media.
Why use Unsplash?
There’s a fine line when using stock images which are crossed the moment a stock image looks like a stock image.
What we mean by that is your images need to look natural.
For example, let’s say you needed an image of someone reading from an iPad. Which image makes a better impression?
This?

Or this?

The first one has its place, but it's not as natural as the second image. It’s colder and harder to relate to. And if a person can’t relate to an image that you post on your website, they’re not going to relate to you.
The second image here is from Unsplash.
Because Unsplash attracts the best photographers, you get to choose from images shot by people who know how to craft photos to capture attention and create emotion. Images that don’t look false or staged.
You're also guaranteed images that look as good on an iPhone as they do on a 50-inch 4K TV – an important factor in the age of multiple screens and responsive websites.
The Unsplash Licence
Photos on Unsplash are available under the Unsplash License. This is similar to Creative Commons Zero license, but with added restrictions to prevent images being used on a rival service.
From Unsplash: All photos published on Unsplash can be used for free. You can use them for commercial and noncommercial purposes. You do not need to ask permission from or provide credit to the photographer or Unsplash, although it is appreciated when possible.
More precisely, Unsplash grants you an irrevocable, nonexclusive, worldwide copyright license to download, copy, modify, distribute, perform, and use photos from Unsplash for free, including for commercial purposes, without permission from or attributing the photographer or Unsplash. This license does not include the right to compile photos from Unsplash to replicate a similar or competing for service.
Adding Unsplash Images to Your WordPress Website
When you find an Unsplash image that you’d like to add to a post or page on your website, you’re free to download and use it how you want, as many times as you want. There are three ways you can do this:
- Download the image from Unsplash and manually upload it to your site.
- Use a third-party WordPress plugin.
- Use the built-in Unsplash and Visual Composer Integration.
How to Add Unsplash Images to WordPress Manually
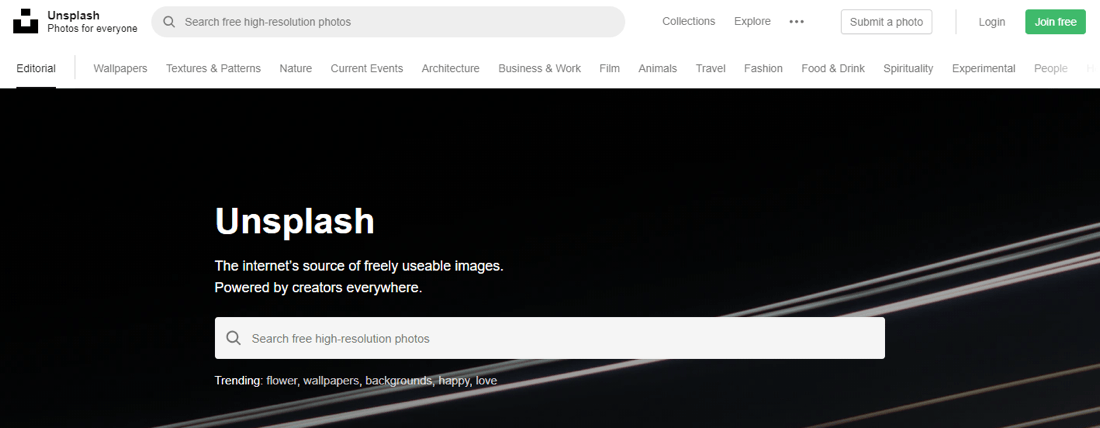
Step 1: Go to Unsplash.com and search for an image using the search bar or categories.
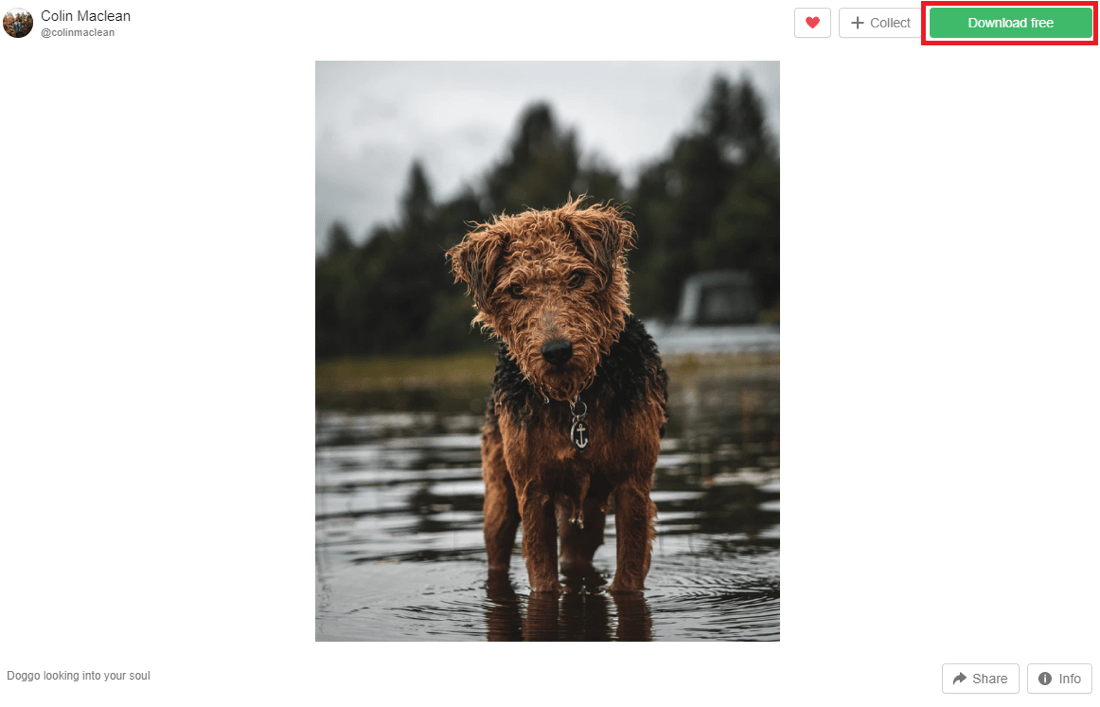
Step 2: Download the image that you like from Unsplash by clicking the download icon that appears when hovering over an image, or by clicking the image and hitting the Download free button in the pop-up.
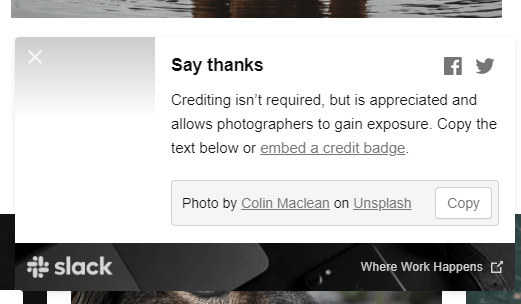
You don’t have to credit the photographer, but if you want to help them gain more exposure, copy the link from the ‘Say Thanks’ pop-up that appears after you download the image.
Step 3: Compress your images using a free site such as TinyPNG or Compressor.io. This step is important because large image files are a common reason for slow loading websites – a dislike of both visitors and Google. As these stats from Unbounce prove:
- 46% of people say waiting for pages to load is what they dislike most about browsing the web on mobile;
- A 100-millisecond delay in load time can cause conversion rates to drop by 7%;
- Pages that load within two seconds have an average bounce rate of 9%, while pages that take five seconds to load have a bounce rate of 38%.
Step 4: This step is the same whether you’re adding an image to a page or a post. Note: For adding images to backgrounds or carousels, go to the Appearance section of your dashboard. From there, follow the documentation of the theme that you’re using. Go to Pages (or Posts) and click Add New.

Step 5: Click on the Add Media button (to upload an image in a particular place on a page, move the cursor to the correct place within the text editor before clicking Add Media). Your Media Library is where all of your images are stored.

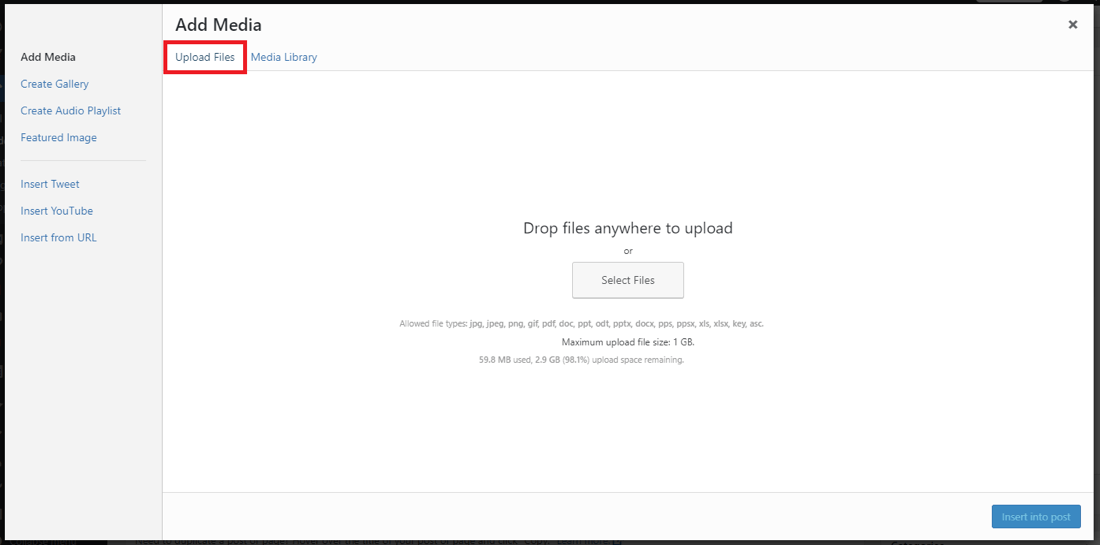
Step 5: In the Media Library, click on the Upload Files tab, then drag-and-drop, or select your Unsplash image from your computer.
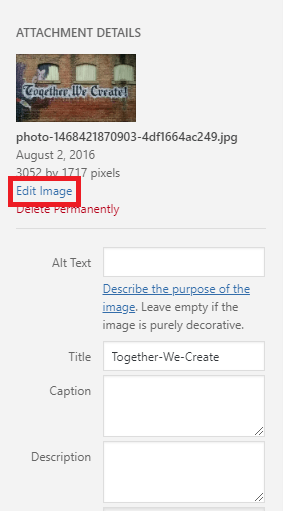
Step 6: Before you click on the image and hit the Insert into page button, add alt text, caption, and description text to your image. Then check the image is the correct size by clicking on Edit image.
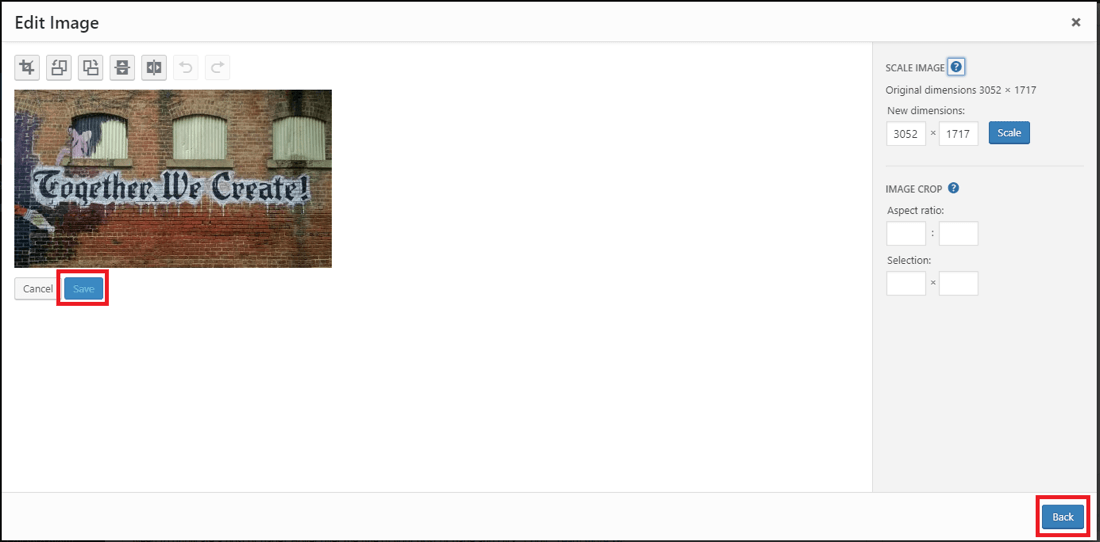
Step 7: From the Edit box, use the Scale Image and Image Crop options to make sure your image is exactly how you want it to appear on your website. Once you’re happy, click Save, then Back.
You’re now ready to insert the image onto your page.
Fairly straightforward, right? WordPress tends to do a good job of keeping things simple.
Where the manual method does fall short, though, is when you have to source and upload multiple images.
If you’re a prolific blogger or are building a new website and populating it with images, going back and forth between Unsplash and WordPress become a bit of a slog. Especially if you have to edit the size of the photo every time.
If you plan on being a regular visitor to the Unsplash library, the following methods may be better suited.
How to Add Unsplash Images to WordPress with a Plugin
WordPress plugins are a lot like apps on your smartphone – there’s one to solve every problem. For uploading Unsplash images to your posts, the best plugin option is Instant Images, which gives you access to photos from your WP dashboard.

Here’s how to add it to your website:
Step 1: Go to Plugins > Add New and search for ‘Instant Images.’
Step 2: Click on Install Now. Once the plugin has installed, click on Activate.
Step 3: Instant Images will now appear as a menu item under Media. Click on Instant Images to adjust the plugin settings and search for photos.
Step 4: When you’ve found the image that you want, click on it to import it to your Media Library (if you want to edit the alt text before adding an image to your Media Library, click on the gear icon).
Step 5: Add images to your posts and pages from the Add Media pop-up in the text editor, as shown in the manual upload method.
If you don’t already have images in your Media Library, an Instant Images button will be added to the text editor from which to find and add Unsplash images to your content via a pop-up.
Once installed, Instant Images is a quick and simple way to get quality photos. But if you’d rather avoid installing a plugin and keeping track of updates, the next option is your best bet.
How to Add Unsplash Images to WordPress using Visual Composer
Before we show you how to add Unsplash images to WordPress in Visual Composer, let's talk a little bit about the feature itself.
What is Unsplash Integration?
The Visual Composer Unsplash integration is a way to access the Unsplash library directly from your website editor.
We created the feature to streamline the process of finding and adding Unsplash images to your website. It does this in two ways:
- By giving you access to Unsplash from the Visual Composer Hub.
- By making images available in different file sizes to eliminate the time-consuming task of manual compressing.
Are all Unsplash Images Available?
They sure are. The Unsplash you see under ‘Stock Images’ in the VC navigation bar isn’t any kind of ‘lite’ version. It’s the full, live Unsplash website.
The only differences are that you’re using it in the backend of your website rather than in your web browser. And rather than downloading images to your computer, they’re sent directly to your Media Library.
Downloading and Adding Unsplash Photos with Visual Composer
Step 1: Click on the Stock Images tab from the Visual Composer Hub.

Step 2: Search for your free stock images in the search bar by entering keywords. For example, if you’re looking for images of fresh seafood, you might enter the ‘seafood market’.

Step 3: Click on the image you want to download and choose your file size: small, medium, or large (for your website, smaller files are best).
Your image will be sent directly to your Media Library.
Step 4: Use Visual Composer image elements to add Unsplash images to your website from your Media Library. Images will automatically resize to suit the size of the content block.
Unsplash photos work for every Visual Composer element that lets you use images:
- Blog posts
- Web pages
- Backgrounds
- Banners
- Carousels
Wrapping up
Using high-quality images across your website makes your content more engaging and memorable.
With Unsplash, you get access to world-class photography in every category you can think of, for FREE. What’s more, you get to use those this photography however you please to make an impact.
Follow the steps in this post to find and add Unsplash images to your website.
If you use images rarely, the manual upload method will serve you fine. If you use images often, go with the Visual Composer Unsplash integration to save you time and effort, and keep 1.2 million beautiful photos at your fingertips.
