As you are at the start of your journey into WordPress or looking for ways to better your site, creating a well-organized menu should be one of the primary things on your to-do list.
If you are only still thinking about starting your journey, then you can head on over to our tutorials on how to install WordPress, customize your theme, and create a child theme (for making changes in your main theme, without affecting its files) if necessary.
This article will lead you through the process of creating, styling, and managing your menus, as well as explain how to easily add a menu to your page with Visual Composer.
So, let's get started!

The Purpose of a Menu
A menu is like a map of your website, so it is important that it is easy for the user to understand, navigate, and most importantly find what they are looking for.
A well-designed menu also betters the user experience, and, as you might have already guessed, translates into conversions later on. Visitors are more likely to stay on a site and browse more content if they are able to reach their intended destination.
In fact, statistics show that bad navigation is the third leading cause of a bad user experience, right after slow loading, and non-responsiveness. As a matter of fact, even the greatest design can't make up for a poorly functioning site.
88% of online consumers are a lot less likely to return after a bad experience
Creating a Menu and Adding Content
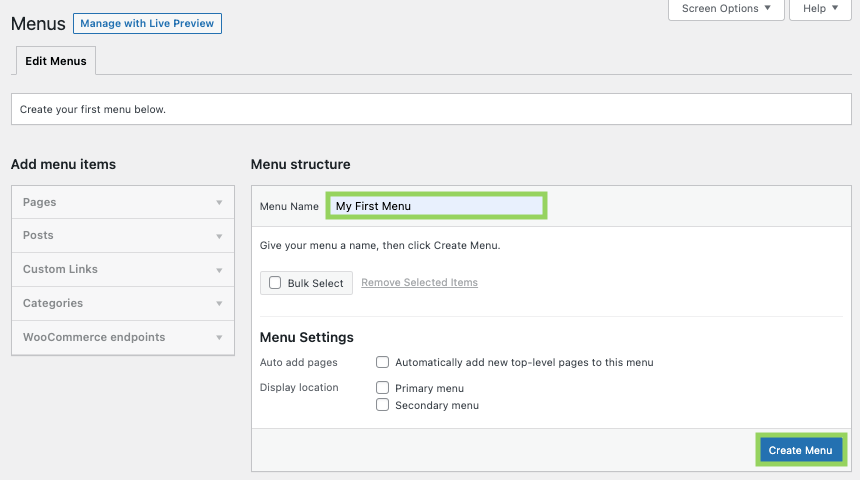
Before we add a menu in WordPress, you need to create one. To create a menu:
- Go to your WordPress Admin Dashboard
- Navigate to Appearance and select Menus from the drop-down
- Click Create a new menu
- Give your menu a name and click Create Menu
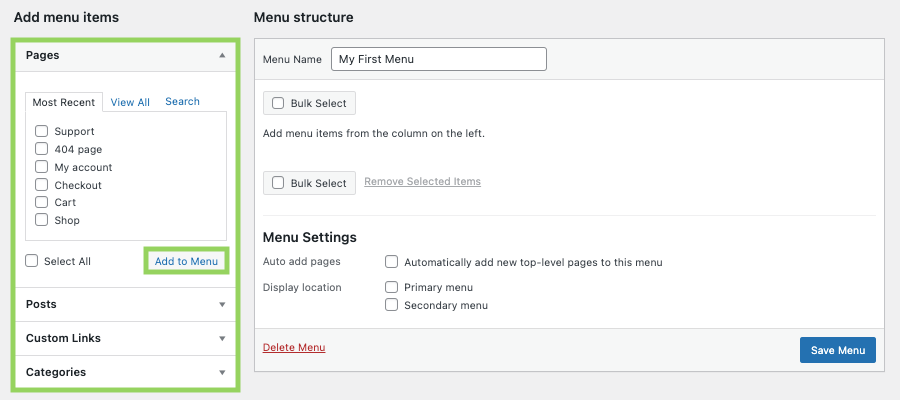
Now that you have a menu, it is time to add sections and fill it with content:
- Select the type of content you wish to display on your menu on the left side (you can choose from pages, posts, custom post types, custom links, and categories)
- Click Add to Menu
- Save Menu
In case you need to remove a section from your menu:
- Navigate to the added items under Menu structure
- Select items separately by clicking on the dropdown and pressing Remove
- If you wish to remove multiple or all items, click Bulk Select, mark them and press Remove Selected Items
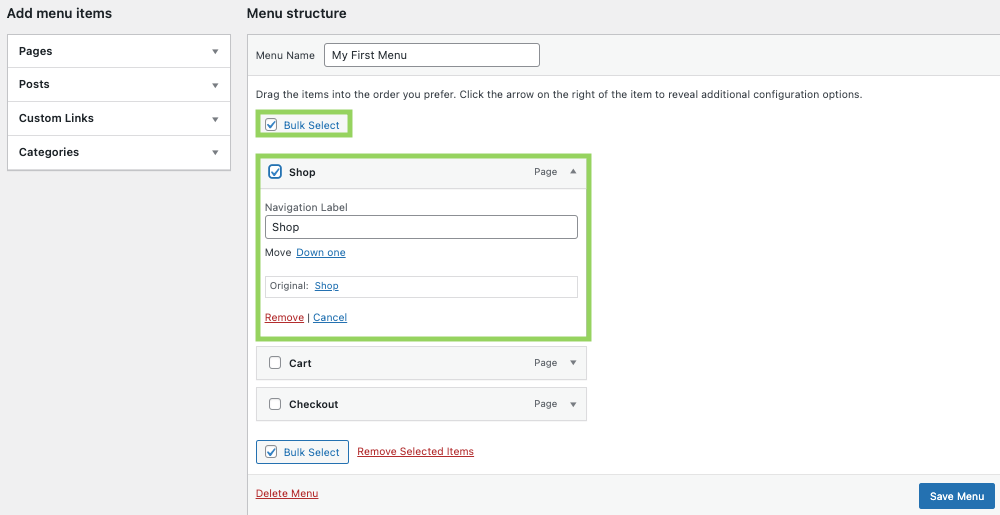
After you've selected the content, you can arrange it and add sub-sections:
- To change the layout of your menu, simply drag-and-drop the sections in your preferred order
- To add a subsection drag-and-drop a section under your preferred location
- After you have finished making changes to your menu, don't forget to click Save Menu
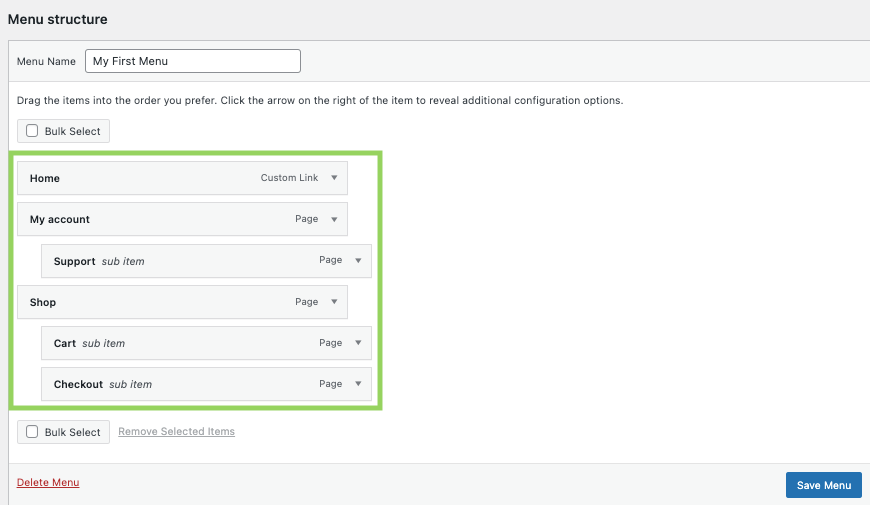
Note: You can also add sub-sections to sub-sections, creating a mega menu with a drop-down.
Managing the Menu Location
Now that you have your menu ready, you can manage the menu locations easily via WordPress Admin Dashboard or Theme Customizer.
To set a location of the menu on your WordPress site:
- Select Appearance and Menus from the drop-down in your WordPress dashboard
- In the menu editor switch to the Manage Locations tab
- You will see all places where you can place the menu in your theme
- Select menus for specific locations from the drop-down menu
- Save Changes
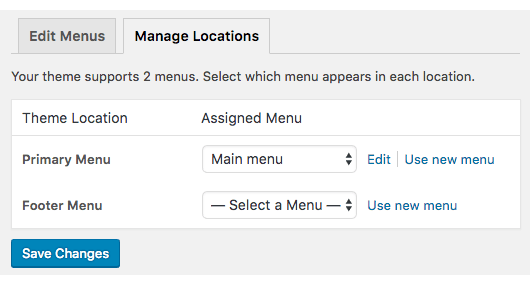
Note: You can also access Advanced Menu Properties (to add link targets, title attributes, CSS classes, link relationships (XFN), and descriptions) hiding in the Screen Options tab at the top right corner of the menu editor.
Adding a Menu with Visual Composer
Visual Composer is a website builder for WordPress, that offers tons of great features when it comes to building a full website in the fastest way possible. And, if you loved the drag-and-drop functionality of WordPress, you will most definitely love our intuitive editor.
Using Visual Composer will save you time when it comes to not only creating and managing but also styling your website menus. Create stunning layouts with over 500 content elements, designer-made templates, and addons, such as theme builder.
Select from a variety of ready-to-go menu elements (basic and sandwich menus, as well as sidebar menus for a more unique design).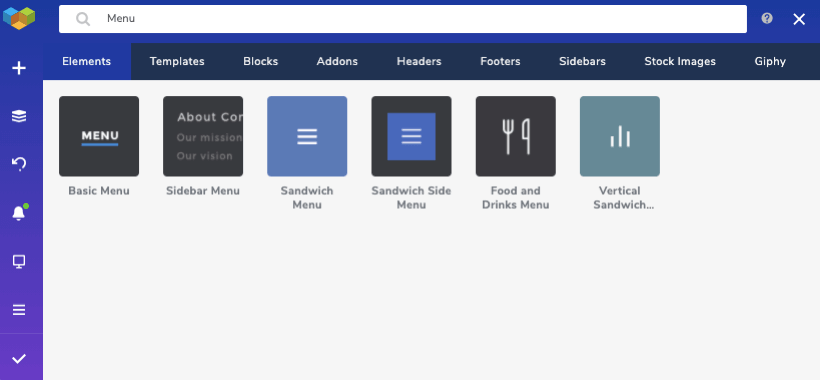
For an even better user experience, you can make your menu sticky, meaning that it will always be visible for the visitor, and easier to access.
Finally, let's get into how to add and manage menus in Visual Composer:
Final Thoughts
Now you know how to create a regular and a drop-down menu, manage the location, and customize a menu for your WordPress website, pretty easy right?
Not only that, but also you know that a menu guides your visitors through the site, ensuring a greater user experience, boosting conversions, and reducing bounce rates. For additional help, you can always add a search bar, in case your visitors still can't find what they are looking for 🥸 🔎
What are you waiting for? Download Visual Composer to make your website building experience easier & faster! ⬇️

Love the information. Thank you
You have provided useful information about the wordpress site’s navigation menu. But I would suggest some steps to customize the navigation menu of a WordPress site:
1.Log in to your WordPress dashboard.
2.Go to Appearance > Menus.
3.Create a new menu or select an existing one.
4.Add pages, categories, or custom links to the menu.
5.Rearrange the menu items by dragging and dropping them.
6.Expand the settings of each item to make changes like the label and URL.
7.Create dropdown menus by dragging a menu item slightly to the right.
8.Save the menu when you’re done.
Readers, If you need any type of guidance about wordpress websites you can take a free consultation from a company like Alakmalak technology. They have such an experienced team of developers.