Single post templates are usually defined by your WordPress theme. This means that you can get one or several post templates depending on your theme choice.
In most cases, it is enough to build a decent blog or portfolio website. Nevertheless, sometimes you need to create a custom single post template. Maybe you want your blog post to stand out, or maybe you have various types of content published under one post type.
Whatever your reasons are, there are two ways how to design a single post template for you. We will look into both of them.
A generic WordPress way that allows you to quickly add a template to your site. The downside is that you will need to have some coding skills to do that. Probably, one of the reasons why people avoid doing that.
And the second way, where you don't need to know anything about coding. An easy way for everyone to design a single post template with the help of the drag and drop website builder.
Let's proceed.
Creating a Custom Single Post Template in WordPress
Creating a custom single post template in WordPress is really easy. All you need to do is create a blank .php file in your text or code editor. Notepad should be just fine, although you can use advanced code editors like Sublime or PHPStorm.
Name your file my-post-template.php and save it. Now, it's time to add some content.
A simple code will create a template named 'Portfolio Template' that will be available for your posts and pages:
<?php
/*
 * Template Name: Portfolio Template
 * Template Post Type: post, page
 */

 get_header();  ?>
Great! You have created a basic post template. Don't forget to save the file.
Next, you will need to upload the new template to your web server. You can use an FTP client to do that. The file must be uploaded to your current theme folder.
By the way, it is recommended to use WordPress Child Theme. If you don't know what it is, check out this quick tutorial on the WordPress Child theme.
After upload, it's time to check out your WordPress site to see if the template really works. Open your WordPress Admin Dashboard, navigate to posts, and create a new post.
In the post window, look for the 'Template' drop-down in Post Attributes. The new template 'Portfolio Template' should be listed there.
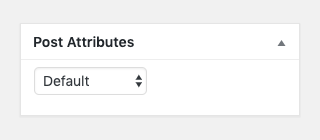
As you select the template, you will see it is empty. Simply because it doesn't have anything to display.
To fix it, we can use an existing template as a basis. Open the single.php file and copy everything after the get_header() line. Paste this code in my-post-template.php and upload it to your server.
As you select the template, you will see it is similar to your single post template. To modify it, you will need to change the code in your my-post-template.php file. Add your own custom CSS, remove unnecessary parts, like sidebar, and so on.
As mentioned below, the problem is that at this point you will need to have coding skills. And this is not an option for everyone.
Now, it's time to check how you can design a single post template without coding.
Creating a Custom Single Post Template Without Coding
Have you ever wanted to create a template you can use anywhere on your site? With Visual Composer Website Builder, you can do just that.
In our example, we will create a set of templates for the header, footer, content, and apply them to the layout. Although you can create a sidebar template, we will skip that to ease the tutorial.
Before we begin, all you need to do is to have the Visual Composer Website Builder Premium version activated to access advanced features.
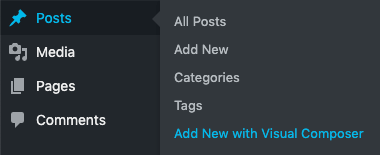
Let's start with creating a new post. You can do that by navigating to the Posts section in your WordPress Admin Dashboard and selecting 'Add New With Visual Composer'.
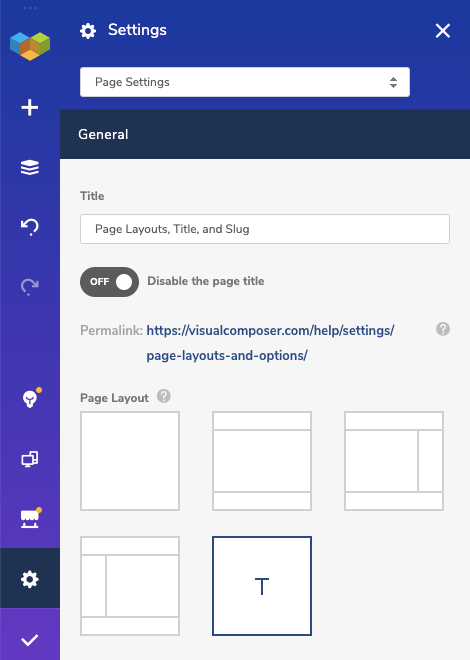
You will see a blank page where you can set your post title and select the layout. Visual Composer offers several predefined layouts and theme default layouts. For our custom post, we will choose a Visual Composer layout with header, content, and footer.
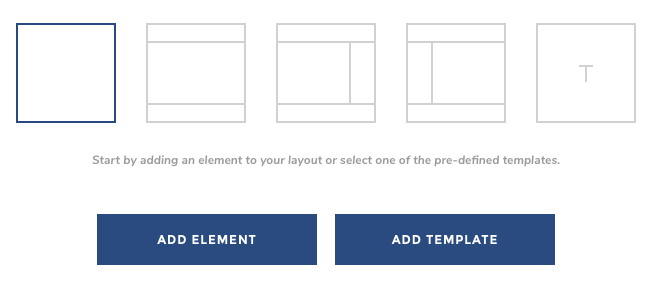
After adding an element, you will see a simple post. It's about time to add some colors to it.
Further, we will need to create your header and footer templates. The best part is that you will be able to use those templates anywhere on your site.
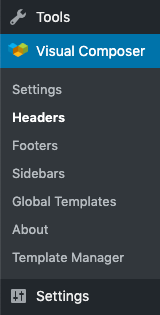
Open your WordPress Admin Dashboard and go to Visual Composer. Navigate to Headers and create a new header.
Now, you can use content elements to create your custom header or access Visual Composer Hub to download some of the ready headers to modify them to your liking. Handy, right? Don't forget to save the header.
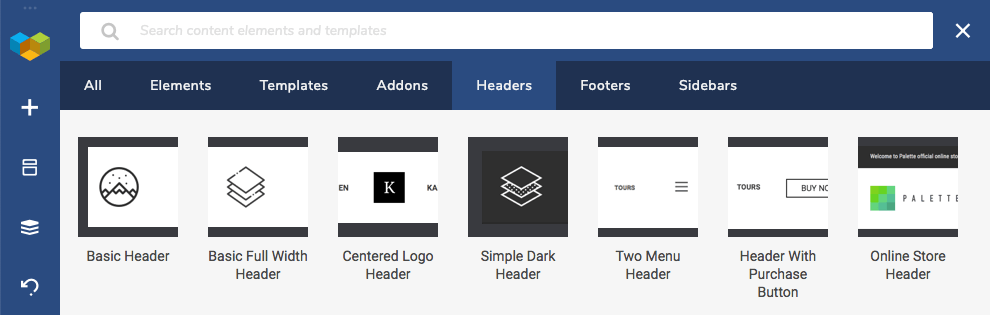
With your header ready, it's time to create a footer template. The process is just the same. Navigate to Footers and create your custom footer design. Again, you can use Visual Composer Hub to download the template.
Once you have your header and footer ready, navigate back to your post. Don't forget to open it with Visual Composer.
In the editor, open Visual Composer On-Page Settings from the navigation bar. You will see header and footer drop-downs with your new templates listed. Select them and voila - your post now has a header and footer.
Great! All you have to do is use Visual Composer elements or templates to design the content of your post. My recommendation would be to design the layout while leaving a blank spot for your post-to-post content.
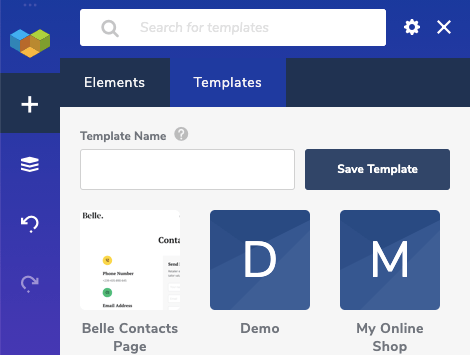
Once you have your content template ready, open the Template window from the navigation bar and save your content part as a template. You will need this template to re-use it.
From this part, the main job is done. Now, you can finish this specific post by adding the actual content and publishing it.
Further, whenever you create a new post, make sure to select the layout with header, content, and footer. Apply your custom headers and footers. Add the content template you created before and fill it with content.
Summary
We've looked into two different ways on how to design a single post template. The native WordPress way requires coding. And an alternative way, where you can use Visual Composer Website Builder.
Both of the ways have their own benefits and drawbacks. While I can't speak about WordPress and its future vision. I can tell you that Visual Composer has their minds set on delivering a new and faster way.
Use any of the methods mentioned above? Share your thoughts in the comments.

Very good article, thank you for sharing important informations!
Thanks!
Hi, thank you for the post. Question: is it possible to bulk change post VC template for all my previously (already) created posts?
Hi I have created a new single post template, can see, edit and apply it. It works for new posts, but does not seem to have updated my existing posts (though they meet the category criteria I ve set). Is there any obvious reason why the template might not be applied to old posts?
Hi!
In the case of a single post template, you will need to edit each post and set it as the post template that is how WordPress allows it to do.
But I have some good news, if you have some SQL skills, you can create a query, that will update all the posts directly in the database and you won’t need to do it manually for each post.
This is an incredible tutorial! I have one question though. I m working on a client s website that was created by someone else. It uses the Poseiden theme (which the client wants to stay with) but he wants the blog redone. No problem! Except there is one, well actually two, problems. The navigation header from Poseiden s blog template I can t seem to get rid of for the life of me and that is actually the main thing the client wanted changed! Specifically, the background and text colors. Secondly, for some reason the featured image is showing up twice, both where I ve specified it to go and directly below the navigation header (the same one the client doesn t like). Any ideas how I can fix these issues? The client loves my template other than these two issues but the problems are causing me no end of headaches! Thank you in advance for any insight you can give me!
This definitely sounds like a theme issue itself. The first problem isn’t quite clear to me but if I got it right then you would find the place where this navigation is added (in code), and wrap it in some kind of if statement, like if(is blog) { … }. The problem is that each template could handle it differently so there won’t be one unique if statement for all cases ned to check it closer.
Related to the second problem, again need to dig into the theme’s code to find the reason. Maybe for the second images, it ads an image from post content? So the best way would be to strip all the HTML tags from the post listing page excerpt.
Btw, did you try to open a support ticket here https://wordpress.org/support/theme/poseidon/ ? 🙂 Or this is a different theme?
Hello: If I create the single post template, does it replace all of my current posts? After I chose a block and inserted, it showed me an already completed post with the new block added to my post (not replacing) so it was muddled and not acceptable. I also wonder about how this effects by blog page compared to my blog archive. I am still having trouble calling the content to the blog page from the archive. I m not sure if the single post will effect this. TIA for any assistance.