When building a WordPress site, typography matters. Along with other branding elements, it establishes your brand’s identity and sets the mood for your site’s visitors. That’s why changing fonts in WordPress can make a real difference.
However, what significantly impacts (and sometimes complicates) the process, is that fonts are defined by the WordPress theme you choose.
Yet the WordPress default TinyMCE editor allows some fonts’ customization. There are a few ways to change fonts in WordPress:
In this article, I’ll guide you through 6 ways on how to tweak your site’s typography, whether you are a coding ninja or have just installed WordPress.
Changing Font Styles Using Theme Customizer
Every theme in WordPress has a theme customizer, either native (default) one or custom. It is a handy built-in WordPress feature for changing your theme’s design without coding, fonts included.
Note that the WordPress theme customizer’s functionality depends on the theme you’re using. So, as each comes with a different set of customization options, you may or may not be able to change the font style.
Plus, there are thousands of themes available for WordPress. And it is hard to tell how rich or poor the fonts options are in the specific theme. Some themes may offer very limited options, while others have feature-rich tools to modify every bit of your fonts.
As an example, we can look into the Visual Composer Starter theme, which uses a default theme customizer for font-family modification.
So, the first thing to check when you want to change fonts is if the theme you use has the option to do it. If it has, you'll be able to find it in your WordPress dashboard. To check it, the first step is to go to Appearance → Customize.
Now you'll see all of the customization options your theme has. Below is the difference between the theme customizer of the Visual Composer Starter theme and the WordPress Twenty Nineteen theme.
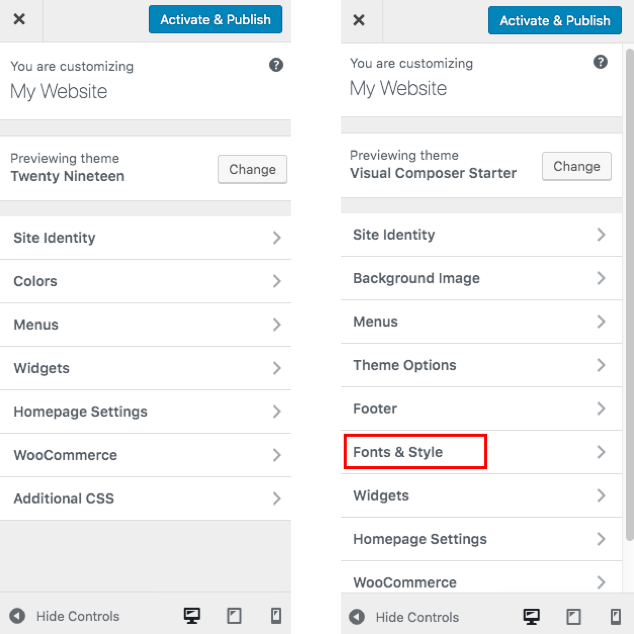
As you can see, the Visual Composer Starter theme has the option to change the fonts, the styles and adjust all parameters you might need for separate heading hierarchy (H1, H2, etc.), paragraphs, and also buttons.
Once you change the settings for your typography, don’t forget to save the changes in the theme customizer. After that, all fonts on your site will be changed automatically.
Installing WordPress Font Plugins To Change Fonts
If your theme doesn’t offer your desired font or an option to change fonts at all, a great (and easy) way to go is a dedicated font plugin. By using one of the font plugins, there is no need to touch your site’s code or implement fonts manually.
There are two common types of font plugins – those embedding fonts and those letting you upload a specific font to use as a typeface. If you are struggling with how to match fonts, a massive source of inspiration could be a FontPair tool.
Back to plugins, there are many plugins to get more typography features than the default TinyMCE editor has to offer.
Plugins that let you use Google Fonts are always a good option as they have around 900 fonts to choose from. Like a popular Easy Google Fonts plugin that allows you to add custom google fonts and control typography via theme customizer. Or you can choose a Google Fonts Typography plugin to change fonts for a specific section or globally across the whole site. This plugin offers a useful live-preview feature to sample fonts in real-time.
But if you want to upload a custom font of your choice without being dependent on predefined libraries, a Use Any Font plugin is one of the well-known options.
However, you can access rich fonts’ libraries within other WordPress plugins, like website builders. Here is the sweetest point: now Google Fonts are integrated into the Visual Composer. It means that you can use it straight from the Frontend editor.
Custom CSS Code To Adjust The Typography
Another way to adjust the typography of your site is by using CSS. It is especially convenient if you are a code newbie. Or your theme’s customizing options don’t include an ability to change fonts. However, be aware that you will lose your changes if you switch between WordPress themes.
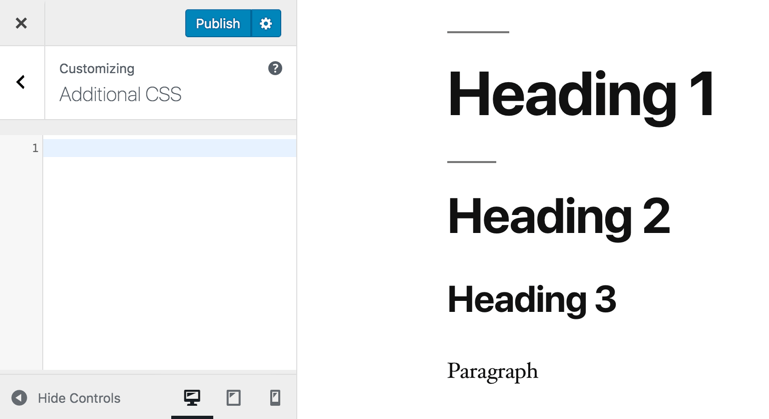
Just as an example, let's say you're using the WordPress default Twenty Nineteen theme that doesn't have the option to change themes in the customization area. But it does have a Custom CSS area. To find this option, open the customizer and click on the Additional CSS tab.
I've created a page showing how Heading 1, Heading 2, Heading 3, and Paragraph text look by default.
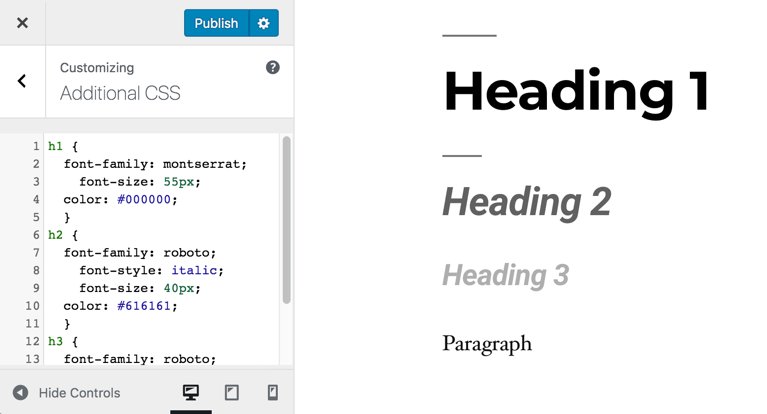
And I've added some custom CSS to change the style. Adding custom CSS allows you to modify your site’s typography and see changes instantly on the right side of your screen. You can also add the * at the start to add the desired font to the whole site.
Note: If you're using Visual Composer, you can add custom CSS straight from the editor to change fonts locally or globally.
Changing Font Styles in Your style.css Stylesheet
Another option for more tech-savvy (intermediate and advanced WordPress users) is to customize the site by modifying the theme files. This approach allows you to change fonts in WordPress with CSS code added directly to the style.css file of the theme.
To find this file in your WordPress dashboard, go to the Appearance → Theme Editor and choose the style.css file below the Theme Files tab. And this is where things might become a little tricky.
Fonts in WordPress themes depend upon a specific theme author's decisions and can vary in different areas of the theme. This means finding fonts in order to change them can be quite time-consuming. And, if you plan to rewrite your theme’s files, it’s better to create a child theme for safety and be able to save all changes after updates.
The best recommendation is to simply find, remove, and overwrite any existing (or particular) font styling, so it isn’t canceled out by anything with higher CSS specificity.
If you want to use custom fonts, there are two options to embed fonts in your WordPress site.
First, you can go with a @font-face rule to define a new font family you want to use. Find, download, and upload a licensed font to your server so you can point out where the font file is (it’s called the font file’s URL). For example, you can use the Google Fonts library to find and download a font family of choice.

Then, specify the font name and put these values (font name and font file’s URL) at the top of your theme’s CSS stylesheet via a @font-face rule. For example:
@font-face {
  font-family: 'MyWebFont';
  src:  url('myfont.woff2') format('woff2'),
        url('myfont.woff') format('woff');
}
By placing a @font-face rule in your CSS file you defined a new font that you can now use in your font declaration rules. Now simply replace your default font with font-family: 'MyWebFont';
The second option is to embed a specific font by using a provided code (in our case, we still use the Google Fonts library as an example). Choose a specific style and click on the rectangle icon to get the code.
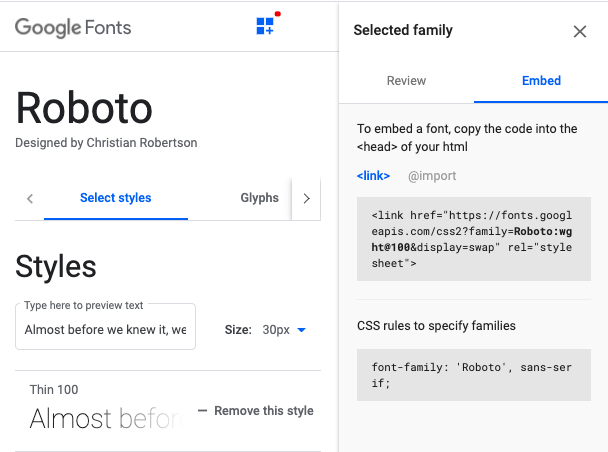
Use a <link> tag to insert it into the <head> of your site’s HTML code or an @import rule to add a font at the top of your style.css file.
Whether your preference is, with Visual Composer you can use CSS, HTML & JavaScript editor to add a custom code snippet or modify a code site-wide or on a specific page.
Add Google Fonts With Website Builder
Nowadays, most people use a site builder when creating a website. And one of the things that they usually offer is the option to adjust the typography that includes changing the font.
As an example, with Visual Composer Website Builder, you get plenty of customization options included. It has an advanced TinyMCE editor where apart from the default options, you can use all Google Fonts, change the font size, line height, letter spacing, and many more.
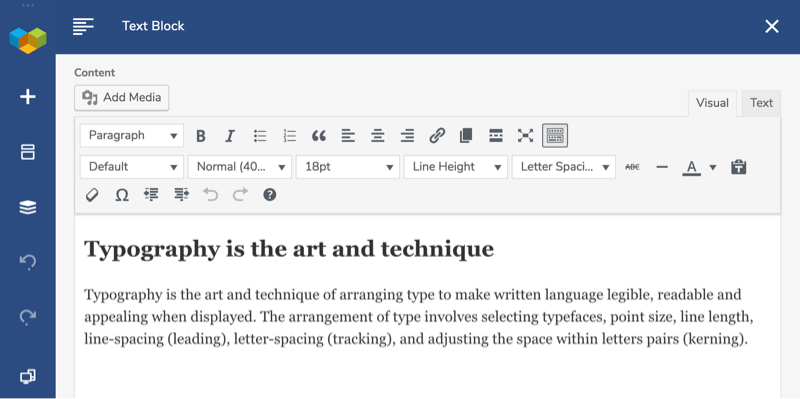
This is certainly one of the easiest ways to deal with the typography of your website as it would be with any WYSIWYG editor, where everything's in one place. In Visual Composer, you can easily experiment with fonts: search for the specific one and browse through the preview.
In addition, in the Visual Composer Hub (a free cloud library with regularly updated ready-made templates, elements, and add-ons), you can add Google Fonts Heading Element to make a fancy custom heading.
Style And Change Theme Fonts With Font Manager
To change WordPress fonts more easily, Visual Composer has released the much-anticipated Font Manager. Which is the perfect solution to changing your theme’s default fonts globally.
With different styling options, Font Manager allows you to change font families, sizes, colors, spacings and has various other text customization options.
And the addon continues to improve - leave your feedback if you wish to impact the future of the Font Manager!
Font Manager is an amazing contribution to countless other premium features of the Visual Composer Website Builder for web creators. With over 90 000 developers, designers, and freelancers using it daily - it's surely the fastest and intuitive way to bring the finished product to your clients!
Conclusion
At this point, you should be familiar with all existing methods on how to change fonts in WordPress. No magic here - just the need to decide whether you want to deal with a little bit of coding or not. Then, apply one of the above-mentioned options and skyrocket your visitors’ experience with beautiful typography (it’s great to get to know typography basics as well).
But the easiest way out to adjust existing fonts and add new ones is using a plugin, or, even better, a website builder. Download a free WordPress website builder, and you will be able not only to control your site’s typography but also to customize other areas of your pages and posts.
