Media file is one of the most basic elements of every website on the internet today. Because the majority of websites that have been published today all have at least a few touches of media elements in their designs and developments.
Some website's main focuses are even based upon these media sharing, selling, and processing, an example of such a website would be a Photography website, Digital studio website, etc.
Therefore it is very important to have a website with a well-developed media library management section in other to keep the library in a nice manner of arrangement for easy access and sorting. Unfortunately, the default WordPress media library section is quite underdeveloped. It does not have options for media grouping, nice file sorting, easy drag and drop features, etc.
That is why we need to implement another tool for this purpose.
FileBird WordPress Media Management Plugin
The WordPress plugin that we would be using is a FileBird WordPress media library folders plugin. It gives you the ability to arrange your media files in a well-organized folder(s) inside the WordPress dashboard. It has a beautiful interface that allows both right-click functions, easy access to browsing and inserting media files to pages/posts/product plus drag and drop abilities.
First of all, you should note that there are two versions of this plugin, the free and premium. The basic difference between these two is that the free version allows you to create up to 10 folders only, while the pro version allows you to create unlimited folders. You can get FileBird Lite free version from the WordPress repository and the FileBird Pro version from CodeCanyon.
After determining which one of these versions is suitable for you, you can install and activate it just like you'd install any other WordPress plugin.
How To Create Folders In The Library
After activating successfully, under the 'Media' tab, click on 'Library' to access and see the plugin options. The library will now show different elements/options for adding new folders, delete folders, rename folders, file, and folder sorting options, etc.
You can create folders easily and add media files to the folders to have a nice organization. But note that the folders created are not real folders that could reflect in the website root directory, rather they are virtual folders which are meant for organizational purpose only. So regardless of what folder you add a media item to, the file structure/URL will not be altered.
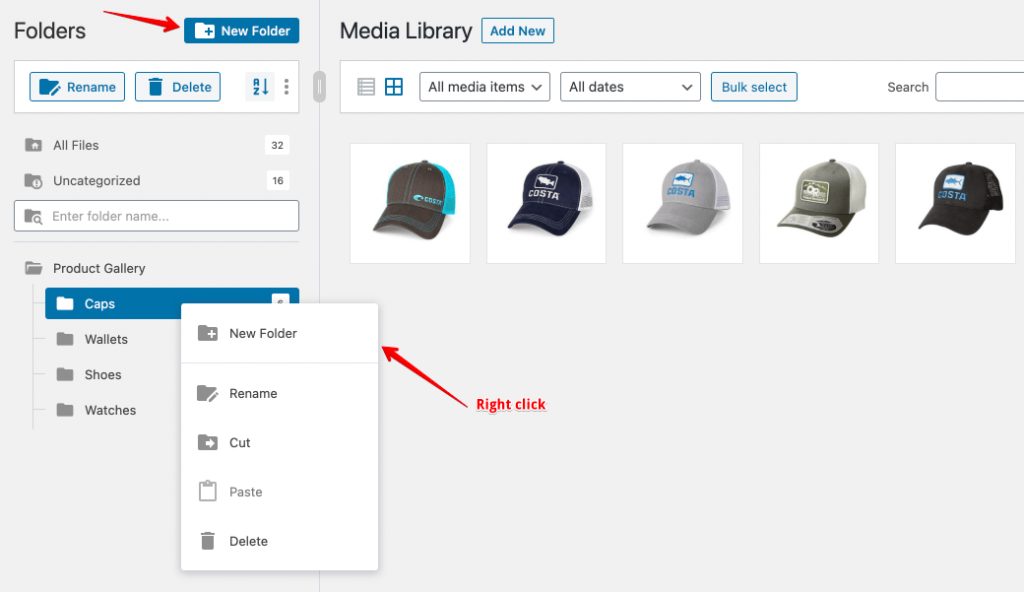
To create folders, simply click on 'New folder', then give it a name. The cool thing is that the naming process supports the use of special characters and spacing.
You can right-click on a folder to see all the available right-click actions possible (such as a new folder, rename a folder, cut, paste, and delete). You can also create subfolders by clicking on a folder and then 'New folder'. Or create a subfolder by dragging the main folder on top of another folder. The dragged folder now becomes the subfolder.
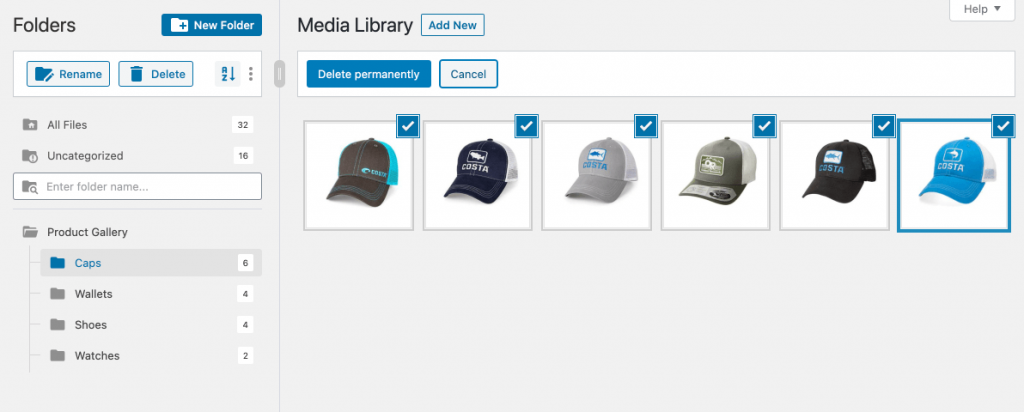
Notice 3 vertical dots at the upper left section of the library opens up the option to 'Bulk Select' folders. This can be used to perform an action of delete.
How To Organize Media Files In The Library
To start adding new files, just click on 'Add new'. There is a dropdown that will allow you to choose a FileBird's created folder you wish to have your file uploads automatically go into. Then you can now use either the 'Select Files' option or drag and drop files from your computer to add the media files.
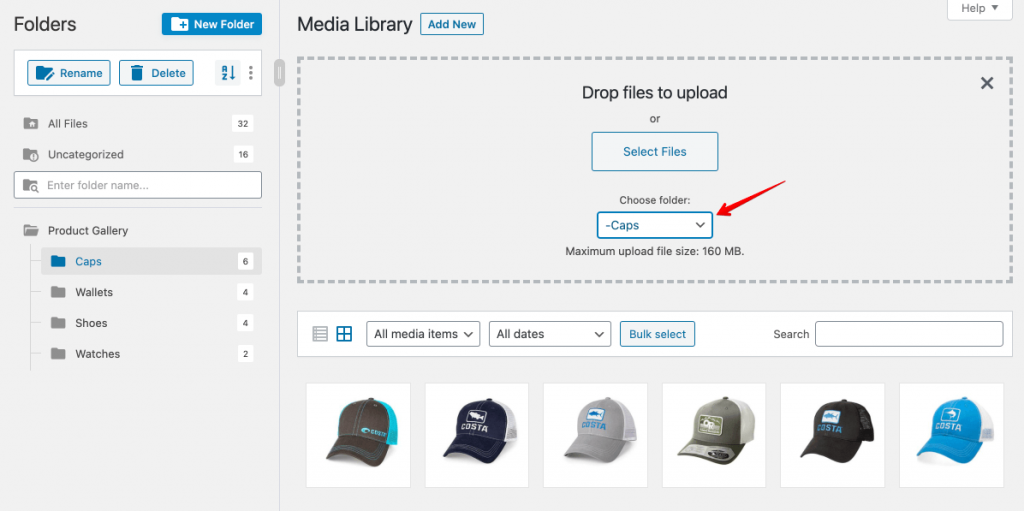
Notice the first two default folders in the folder sections. 'All Files' displays all the media files on the website, but 'Uncategorized' show media files that have not been added to any folder, from any of these two default folders.
You can move files one by one or in 'Bulk Select' mode by dragging and dropping them to a specific folder that you want. You can also move files around from one folder or subfolder to another folder or subfolder.
How To Sort Files And Folders
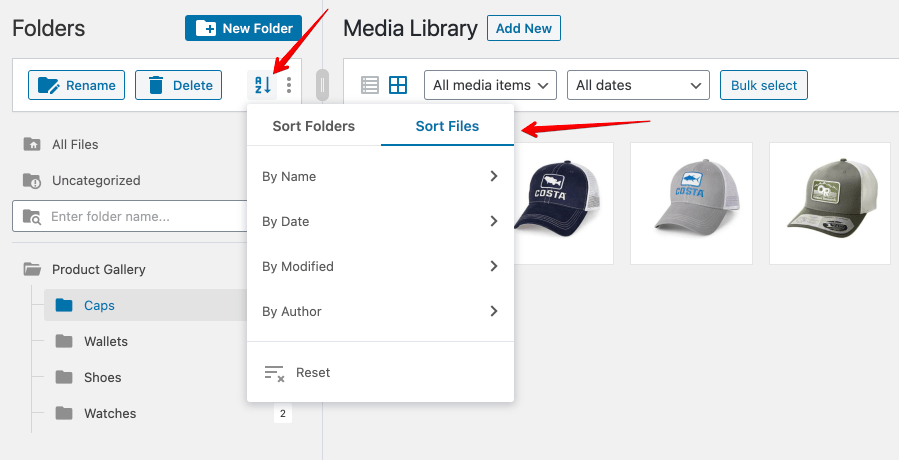
FileBird allows you to sort folders and files. The icon to toggle this setting is located beside the three vertical dots, it is represented with alphabets A and Z.
When this icon is clicked, it shows two tabs 'Sort Folders' and 'Sort Files', and an option to 'reset' the sort settings. The folder sorting could be either in ascending order or descending order of alphabets. But the file sorting option allows you to sort either in ascending or descending order of Name, Date, Modification, and Author.
It is also possible to manually sort folders by dragging and dropping or by cutting and pasting method.
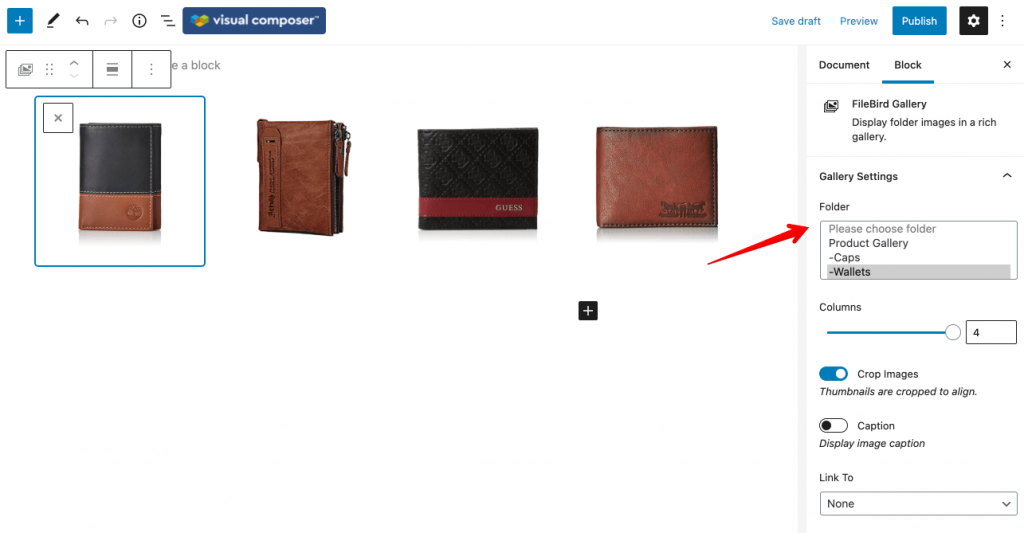
How To Create An Image Gallery In Gutenberg Editor
Creating an image gallery is a FileBird setting that works with Gutenberg block editor only for now. This gallery feature is being developed with more options, settings, and different editor compatibility. So right with Gutenberg editor, you could create an image gallery to display multiple images in blocks of defined columns, captions, and cropping options. This works in both pages and posts.
How To Insert Media Files Into Pages/Posts
In order to insert media files into posts and pages, edit an existing post or page, or create a new one. Depending on your type of post editor, click on the appropriate area for selecting media files.
There are two ways to add media files to your posts or pages. The first option is to upload media files directly into the page by selecting the file from your computer. Or you can choose the media files from the existing files in the media library.
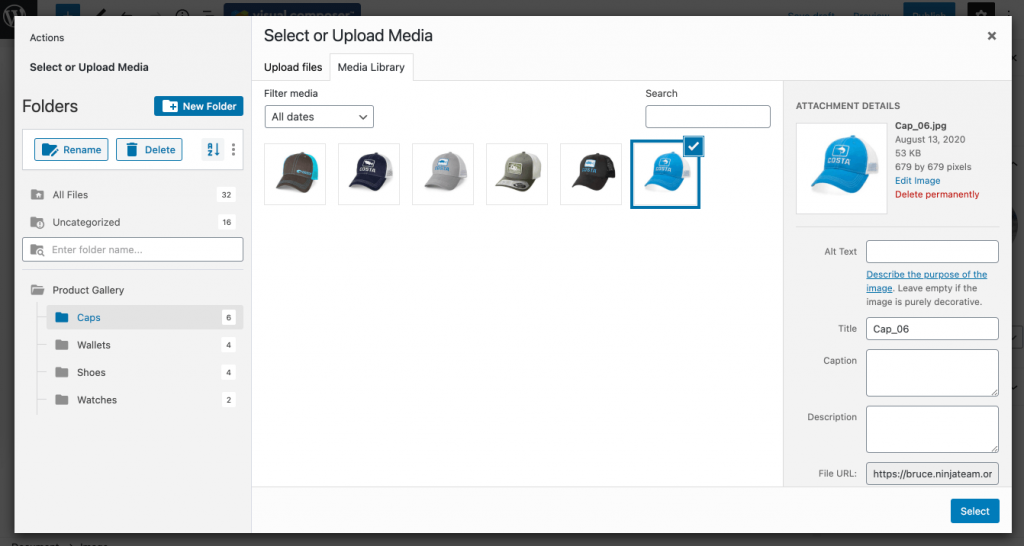
If the first option is to be used, FileBird gives you the ability to select an already created folder category first and then upload the file from your computer that automatically goes into that selected category. By clicking on the 'Select' button, it would insert the media file into your page while also adding it to the selected folder which would start reflecting inside the library.
If the second option is to be used, FileBird also gives you the ability to select files to upload from the list of dropdown folder categories that are already created in your library area. Thus clicking on the 'Select' button will insert the media file into your post.
Conclusion
Hope this article has helped you to understand how to organize the WordPress media library folders and has also given you some insights about FileBird! If you like this article, don't forget to comment.
P. S. This piece is written by our friends from the NinjaTeam - a team of WordPress plugin development. They build products that help save time and effort.

very helpful article.
You have covered everything in such a way that even a beginner can understand it..
thanks for sharing this amazing article..