Real estate photography will always be required, no matter how the industry evolves. The real estate market is very picky and impressing customers is not easy, especially if the photography is not up to scratch.
Good visuals will stir the interest of home buyers, but photographers also need to capture the proper features in the right way to truly grab attention. It’s challenging work for any photographer, yet the rewards are great for those who learn the ways of the perfect property shot.
There are a lot of real estate photography tips that you can follow, but it all starts with good equipment, beautiful properties, and favorable lighting. Without those, you’ll find it difficult to get anywhere with your photos.
At the end of the day, your work is intended to help agents sell more homes, and to this end, our team at Visual Composer has gathered some of the best real estate photography tips for you to improve your craft.
Will These Real Estate Photography Tips Help with Your Portfolio?
Certainly! If you’re new to real estate photography, you can use these tips to help you build your own real estate photography portfolio based on the photos you take throughout the year.
Real estate agencies are always in need of photographers for their properties, to make them look more aesthetic and sell them faster. To get noticed, you need to impress potential collaborators through your best pieces of work assembled into a portfolio they can view.
Considering today’s online revolution, it would be best to build your portfolio digitally using a Content Management System (CMS). The most popular CMS is WordPress, which lets you add a wide range of functionalities to your site if you are planning to expand your services.
You can even build an IDX real estate website using WordPress. IDX is a type of website that connects directly to the MLS (Multiple Listing Service) and allows users the opportunity to see available property listings based on the photos. Thus, WordPress is also a great choice for real estate agents that do their own photography.
WordPress is known for the massive array of themes available. You can choose between thousands of free and premium themes, all with a different purpose and style. The rich library of themes will make your decision a bit more difficult, but the process is worth it.
After all, the better your website looks, the more clients you will attract, and that means winning big.
Even though you can select amazing pre-made themes for your online portfolio, the page layout you create will require some thought. A website that is based on visuals will generally require more work compared to one that involves a lot of copy.
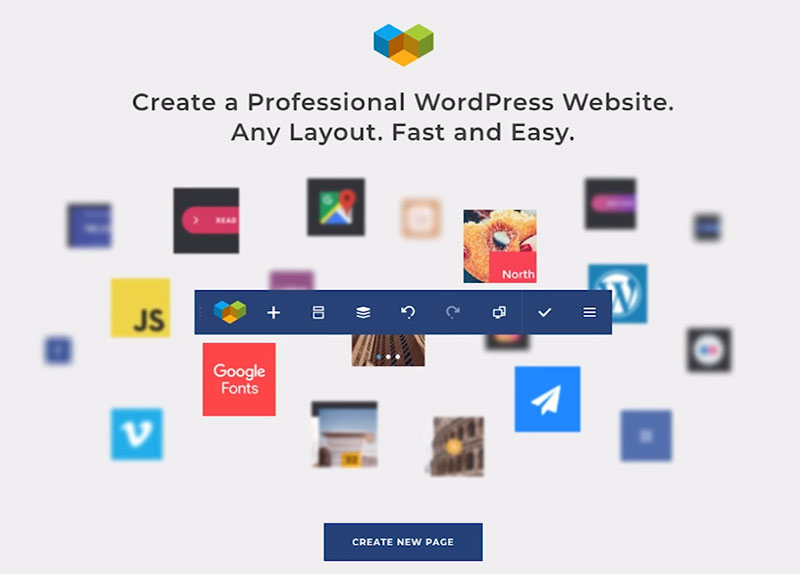
To create your portfolio to a professional standard with ease, you should look for themes that are compatible with plugins like Visual Composer. This is a tremendously helpful tool that lets you create layouts according to your own requirements, without limiting you in any way.
With Visual Composer, you can perfectly fine-tune the layouts you’ve created or simply choose one of the many pre-made layouts. It has a drag and drop interface so anyone can use it regardless of their experience with managing websites. Easy peasy!
Before moving on…
Standard shots go first
These are still real estate photography tips, but we assume that you know them by know. We just want to reinforce the ideas and point them out for those who are just starting with real estate photography.
The first bit of advice refers to taking standard shots. These are the shots you’ll be using the most, so focus on taking a few good ones for every property you cover. Here’s a list of the most common real estate shots:
- Wide-angle shots of each room
- 1 good bathroom photo
- Multiple backyard photos
- 1 photo for each special feature (e.g. laundry room, pantry, garage, etc.)
You don’t have to include details into those shots. The whole purpose is to show people the property as it is, no aesthetics involved. Detailed shots from appealing angles will come second.
You need to make sure you have those shots first, to have the property in its entirety covered regardless of how the artistic shots turn out.
Take your time to analyze the property
Don’t go directly into photographing the moment you step onto a property. Take your time to look at the rooms, find their good spots, and decide what the main focus is. Getting familiar with the space is a condition in all contexts for photographers and rushing in to capture images won’t lead to beautiful results, so just take your time.
Take advantage of this spare time to take some test pictures and see what looks good on camera and what doesn’t. This is an approach that helps photographers capture details that are less perceptible to the eye of a house viewer.
You can also take the basic photos we’ve mentioned above while analyzing the property for more pleasing compositions. This is pretty much what all real estate photographers do.
Real Estate Photography Tips Won’t Help Without Good Equipment
You can read as many real estate photography tips as you want, but you can’t apply them unless your equipment is up to the task. High-quality equipment is of great importance for real estate photographers — and that’s no news.
You’ll have to invest quite a lot into this if you want your business to work, so give this step enough time and do your research in terms of products.
Camera
The most important part of your equipment is, of course, the camera. Without a good camera, you won’t be able to deliver quality real estate photos. The best type of camera for this duty would be full-frame.
Taking wider pictures is the key to success in this domain, to give the viewer a sense of open space, along with other real estate photography tips we’ll cover later.
Choose a camera with a cable release function and invest in a flash, in case you don’t have one. Although you’ll need to choose good moments for your photo shoots for better lighting, a flash always comes in handy for removing those stubborn shadows no matter the time of day.
You will also need to invest in multiple sets of lenses and some wireless triggers. Wide-angle lens sets are the best for real estate photography, but you can opt for other sets, too. Try 10-22mm and 12-24 mm for cropped sensor and 16-35 mm for full-frame.
Lenses
To take the best shots, you’ll need specific lenses. Good lenses can vastly improve your camera’s potential, so you definitely have to invest wisely here. Buying wide-angle lenses are recommended in real estate photography because you can capture more, but they are not cheap.
They can cost over $1,000, though you don’t need to opt for this grade of lens right away. A 24mm wide-angle lens should be enough for shooting rooms without making them seem small, and you’ll have to take around $100 out of your pockets, which is reasonable.
Another category of lenses you should check out refers to tilt-shift ones. Those are great if you have trouble with converging vertical lines, which happens often in real estate photography because of wall edges and door frames.
Note that tilt-shift lenses have a fixed focal length and you might need a 16-35mm zoom lens to compensate.
Flashes
Standard built-in flashes might be too weak for real estate photography, but a powerful external flash can work wonders when natural light doesn’t help you. Even though lighting might be great, a flash will balance out the image and that will show when post-processing the shots.
Real Estate Photography Tips for Lighting
Even though a property might not be the best on the market, you can improve its appearance by making good use of lighting. Today’s powerful cameras use HDR to balance contrast, but highlights and shadows are not captured properly without good light.
That’s why you need to focus on creating a well-lit environment for taking the shots. Supplemental light sources will let you bring out the best in the room you are photographing, especially when positioned with forethought and care.
There are many real estate photography tips when it comes to lighting, so let’s break this down in categories:
Natural light
Make sure that there is enough natural light getting inside when taking your shots because otherwise,you might not be able to capture the elements that matter. Artificial light sources won’t replace natural light. It will only balance it out.
You need a combination of both to get the best out of the space you are photographing. You can enhance the effect of natural light using LED panels and reflectors. Metal and wooden textures are the most visible when placed in direct sunlight.
Artificial light sources
Most properties get their lighting from windows and interior lights. You can use those to maximize the lighting inside the property, but don’t forget to bring your own light sources like strobes or flashes to balance out the lighting.
Flashes are not constant, compared to fixed interior lights, so you will need to figure out your camera settings to fit the light exposure.
To darken the light when using a flash, change the shutter speed. Artificial light sources like these give you more flexibility in terms of what details you want to point out.
Tripods
If you use a lot of extra equipment to get the lighting right, one of the best real estate photography tips would be to invest in a tripod. When shooting by hand with artificial light, the photos will tend to look darker and blurry.
With a tripod, you can shoot at slow shutter speeds and obtain the sharpest images even in low light.
Umbrella brackets
The final item on the list of lighting equipment is the umbrella. The farther you place one, the less light will come through it. Pay attention to the lining of your umbrella, as it can vary from metallic nuances like silver and gold to plain white.
Going with plain white is the best decision for a clean effect.
Real Estate Photography Tips for The Best End Product
Moving on to the most important part of taking real estate photos, here’s what you need to know about coming up with the best end product for your clients:
Post-processing
Save the files in the most appropriate format for your needs and decide what the image you are planning to edit is going to be used for. Some MLS specify exactly what type of files and sizes they require. If you have these, use them accordingly.
There are no real estate photography tips that can help you if your eye is not trained for this kind of edit. It takes time and experience to edit images, especially considering the amount you’ll need to process.
Photographers use different techniques for their post-processing stage, so you can build your own techniques over time or research what the pros do.
The easiest way to edit several images at once would be through batch processing. It saves time, but it also requires attention to detail. In batch processing, the effects that you add to one photo will be added to the rest items in the batch automatically.
There’s not a lot of editing involved in real estate photography. You just have to make sure that the color temperature is right, the mid-tones are set properly, and there is enough structure in the composition.
You can play around with shadows and highlights or remove aspects that are not aesthetic, without altering the overall look of the property. You want the images to be as realistic as possible, to avoid misleading clients.
Video
If you own the needed equipment and you want to kick it up a notch, consider using video. Static photography can get boring at some point, and stepping up the game using video could mean gaining recognition on the market much quicker. Clients will find it easier to envision themselves in the house.
Other Real Estate Photography Tips That Could Help
Keep the property tidy
Even though this is not your job, this is one of the real estate photography tips you won’t receive that often. Cleaning the property is not your job, but it can improve the shots you are taking tremendously.
It would be more efficient to discuss with your real estate agent who can liaise with the homeowners and discuss cleaning the house before the actual photo shoot. The surfaces should be clear, the counters clean, and the overall décor minimal.
Work with angles
Choose the angles properly when photographing the room. Trying to capture as much as possible from the corner is not a good choice because the final image will look boring.
It would be best to explore interesting angles that are not used that often in real estate photography. You can try shooting the room from the doorway to capture the maximum amount of space possible.
Pay attention to distracting elements — try to remove them from the frame entirely.
Choose the right moment
Choosing the proper moment of the day to plan the photoshoot is essential as well. Try to check the weather in advance and see when the sun is up. Do the photoshoots during the day to take advantage of natural light. If it is too cloudy, it would be best to postpone the photoshoot.
Another valuable real estate photography tip would be to shoot the property in different seasons. Even though this is pretty complicated to do, it would work great for a property that doesn’t seem to sell that easily.
Line of sight
Pay attention to what people can see through the windows in your photos. This is a common mistake of beginner real estate photographers. Try to capture a good line of sight through the windows. If the outside space is not aesthetic, find an angle that focuses on the sky.
Keep the blinds and windows open
Besides the obvious benefit of letting natural light in, opening the windows and having the blinds up will give a sense of openness to the property. Keeping them closed won’t benefit your images in any way, so remember this detail when prepping the room.
Final Real Estate Photography Tips to Keep in Mind
There are lots and lots of real estate photography tips that you can follow, so you need to select the ones that apply to you. Note that you are not reinventing the wheel with real estate photography. The client will clearly state what they want and you need to be in line with that.
You can add a personal touch to the photos, but don’t go over the limit. Mastering angles and perspectives is a must for real estate photographers, so ensure you know how to find the best compositions before getting artistic.
The most important aspect of being a real estate photographer is to build a regular procedure for yourself and follow it each time so that you create a consistent style that can be recognized easily. Once you have your routine down, feel free to experiment a little.
If you enjoyed reading this article about real estate photography tips, you should read these as well:







Nice content! Very informative and well written. Thank you for sharing your ideas!
Amazing Blog on Real Estate Photography Tips, There were some really eye opening points in the blog, thanks for sharing
– Images Retouch
Thank you for this well-detailed content. I’m sure this will be certainly helpful in the near future.
Thank you for the helpful real estate photography tips! As a KW agent I will be to sure to use these tips in my next listing!