WordPress is the most popular CMS (content management system) in the world, powering over 42% of all websites on the internet. This is due to a flexible learning process (also well known for the 5-minute installation), limitless creation and customization possibilities, and a powerful community behind it.
WordPress.org is a self-hosted, open-source platform that is free for anyone to use. The main difference from WordPress.com is that you need a domain, a hosting provider and meet certain technical requirements.
In this article, we explain how to install WordPress in three ways - through a hosting provider (easiest way), locally by hosting your website on your own computer, and manually using FTP (data transfer system).
Note that the manual installation requires a bit more technical knowledge, but is doable if you stick to the instructions. We would recommend using the hosting approach because it's the most convenient way. Hence, you need hosting, either way, so shoot two rabbits with one shot!
Requirements prior to the installation
Before installation, make sure that your hosting provider meets these WordPress requirements:
- PHP version 7.4 or greater.
- MySQL version 5.6 or greater OR
- MariaDB version 10.1 or greater.
- HTTPS support
And requirements for local installation:
- Login Account (user id and password) to the server via FTP or shell
- Text Editor
- FTP
- Your web browser of choice
WordPress recommends using these hostings, but nevertheless, most of the top hosting providers offer one-click WordPress installations, due to the popularity of the platform.
We recommend using Cloudways Managed Cloud Hosting since it has user-friendly hosting plans (plus a free trial), a fast setup, and provides excellent uptime. Meaning users get an overall better performance, security, and top-notch support.
1st way: Auto-install WordPress via hosting (Cloudways)
Estimated time for installation: 10 minutes
Installing a Visual Composer website on Cloudways simply takes one click! Meaning you can get a free page builder and a hosting service in one - bundled together.
- Go to Visual Composer on Cloudways in 1-click page and click 'Launch Visual Composer Free'
- Create a free account on Cloudways
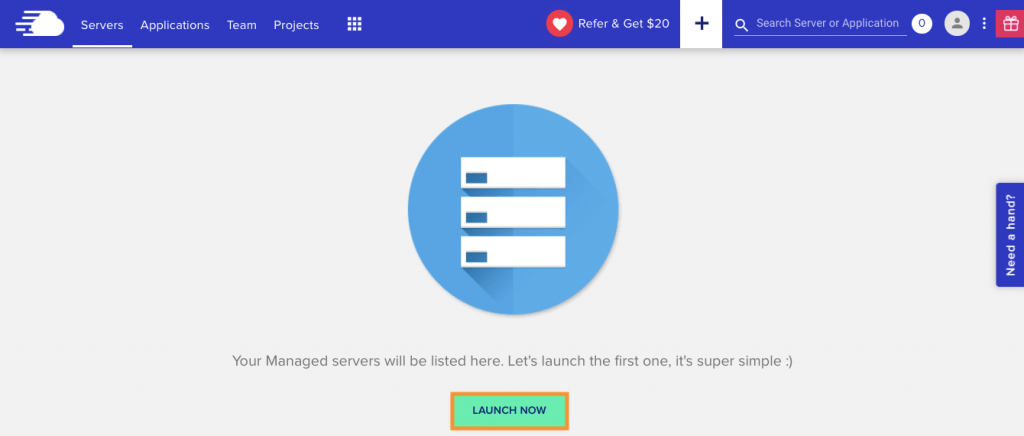
- After verifying your account, start by launching your free trial server
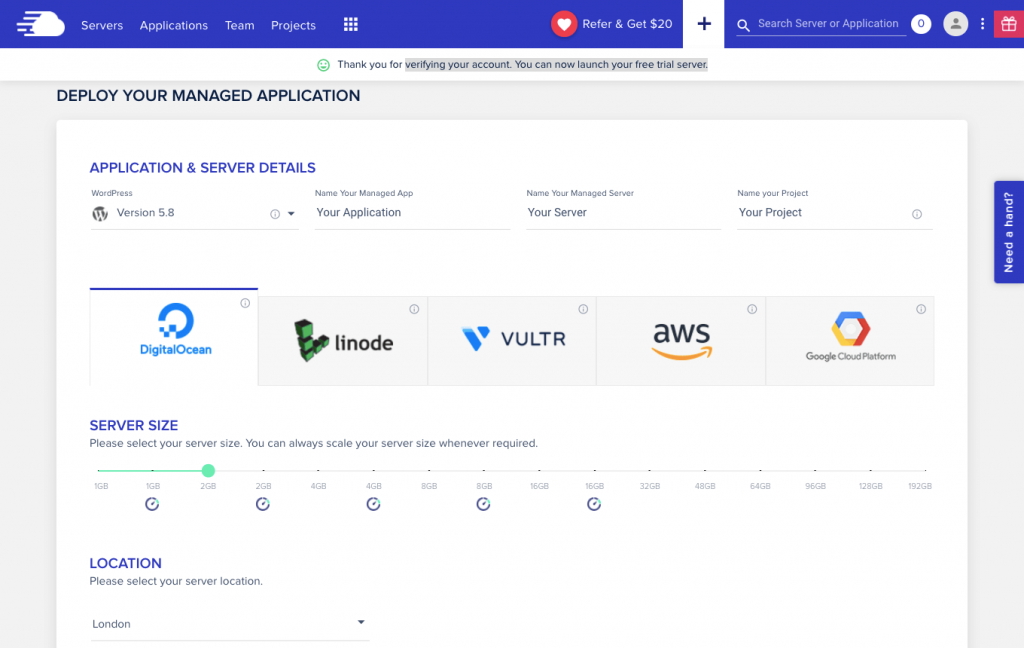
- Choose the WordPress version that fits your needs - we recommend choosing the first option, which is also optimized for Cloudways
- Enter a name for your application, server, and project (completely up to you)
- Configure server settings - choose a provider (DigitalOcean - in our example) and server size for your website (which you can always upgrade)
- And finally, select your server location (take your target audience's location into consideration for the best choice)
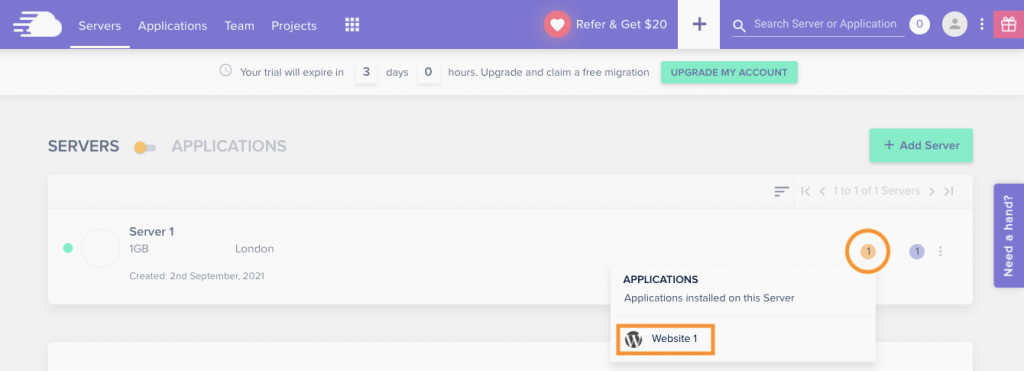
- Now your website is live, to access it, click on the orange dot on the right-hand side and select the application (from the previous step)
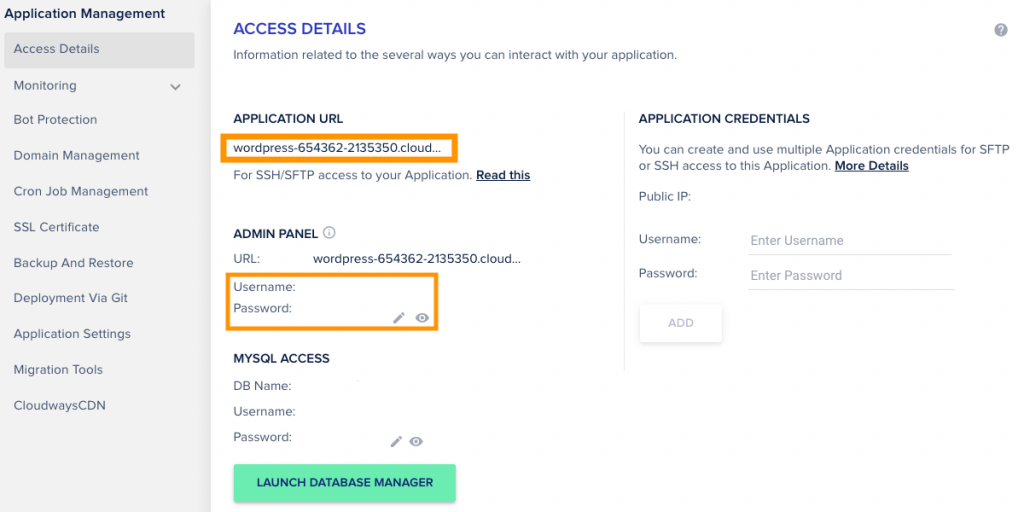
- Click on the website link provided on the application management page (under the admin panel) to open your website
- To access your WordPress dashboard, add /wp-admin at the end of your website URL, copy and paste the username and password from the Cloudways admin panel. And you're done!
Lastly, before you start building your website, get a suitable domain name - domains.google & domain.com are a couple of great domain providers (starting as low as $7/yr).
In theory, you can live without a domain and use your IP address to access the site or use the randomly generated domain your hosting service provides. But, it is a common practice to use a domain that represents your brand, so don't sleep on it!
After you've purchased your domain, you can change it in the Cloudways settings under 'Domain Management'.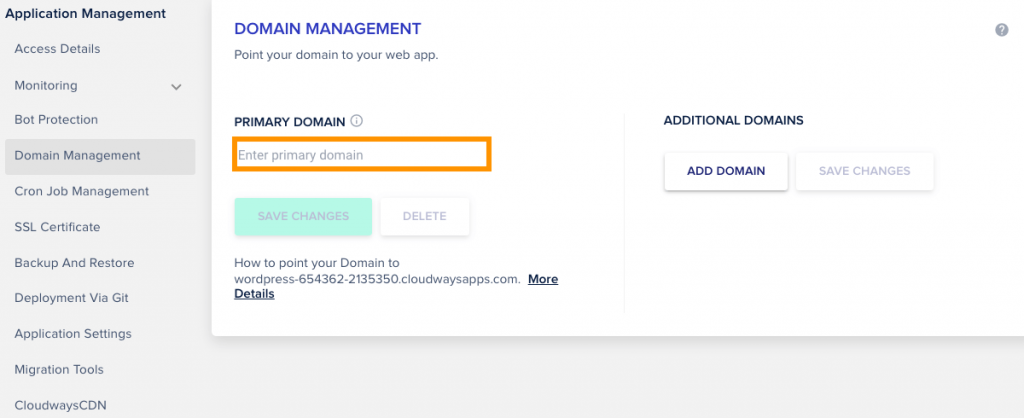
Note that Cloudways also offers a free SSL certificate 🔒 (with Let's Encrypt), which is crucial for visitors to know that your site is secure, which is yet another reason to choose Cloudways hosting.
2nd way: Install WordPress locally (LocalWP)
Estimated time for installation: 5 minutes
LocalWP is a testing environment that lets you host your website on your own computer. This is a great way for designers and developers to create a website (for themselves or clients) to later on transfer to the live site.
MAMP and XAMPP are also popular local servers, and you can learn more about the benefits of each of the servers here.
- Download Local to get the .zip file
- Install the application on your computer
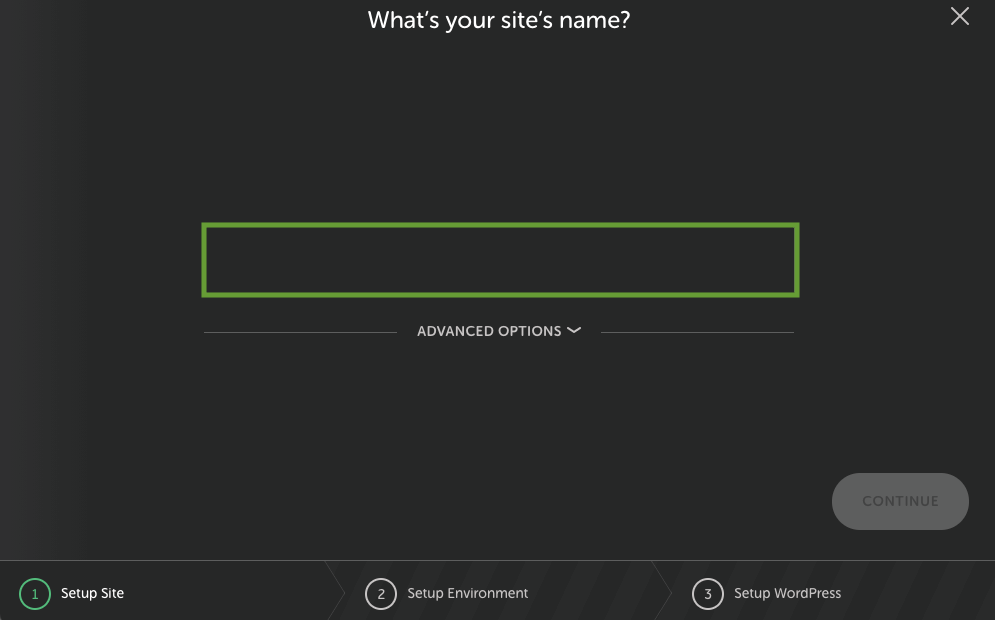
- Once you've opened the application, click on 'Create a new site' and enter a name for your site
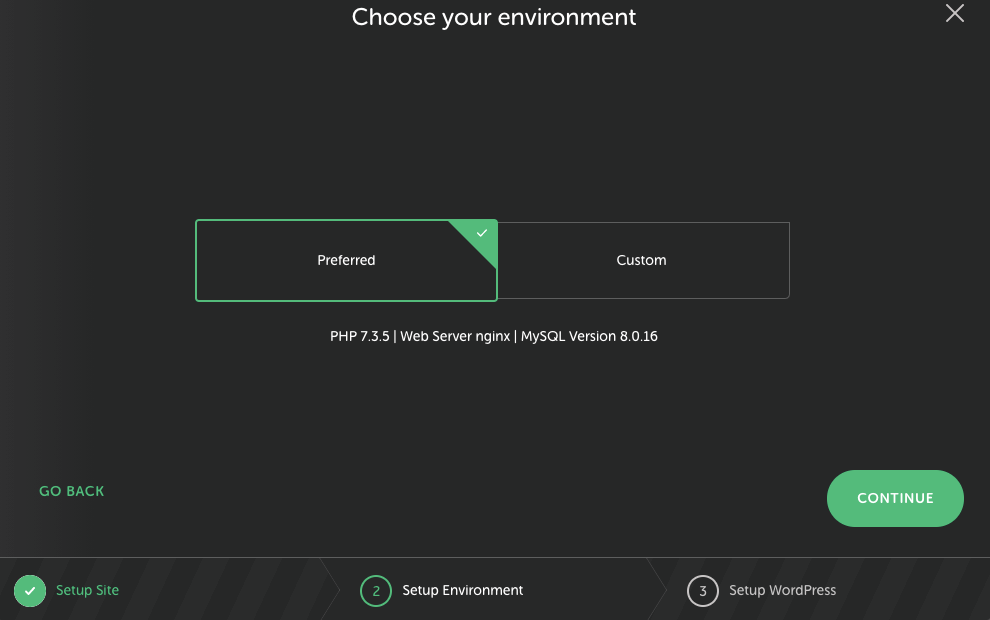
- Now, pick an environment for your website, you can select either 'Preferred' (as in our case) or 'Custom' if you wish to select a different PHP version, web server, or database
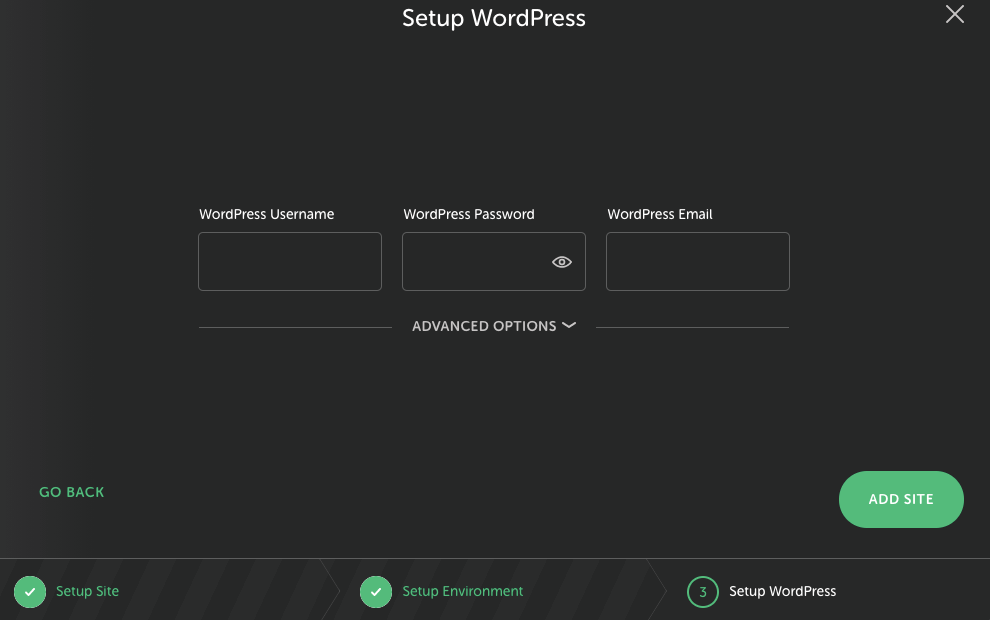
- Next up, set up your WordPress username, password, and email
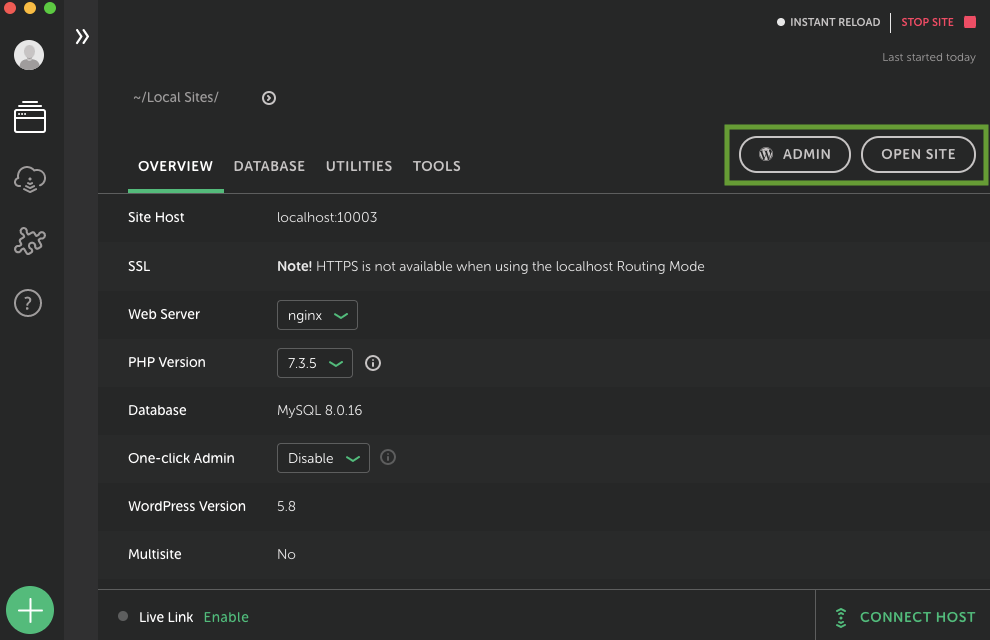
- Once the download is complete, you can start creating a website from scratch locally (for your eyes only) and access it by clicking on the 'Admin' to log in to your WordPress Admin Panel (with the credentials you created in the previous step) or 'Open Site' to view your site.
3rd way: Install WordPress manually using FTP (MySQL)
Estimated time for installation: 12 minutes
This tutorial will explain to you how to install WordPress on your existing web server (live or local) with MySQL, but you can also use MariaDB.
- Download the latest version of WordPress.org to get the zip file
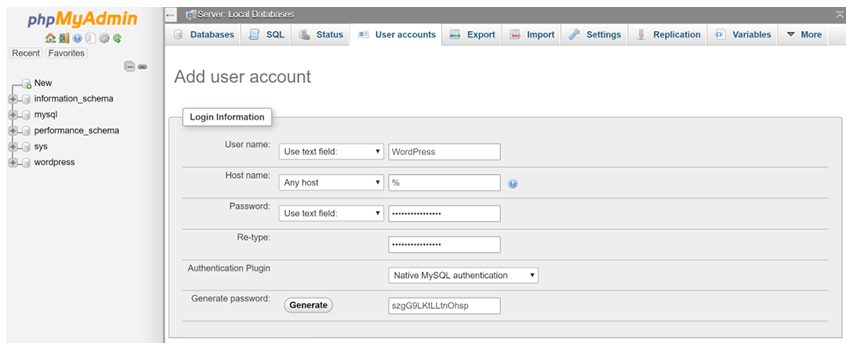
- Create a database for WordPress on the web server. You can use the phpMyAdmin database management system which is installed on most of the web servers (how you access the database depends on your hosting provider)
- In phpMyAdmin, check the section Databases and choose Create database
Now you are ready to start the actual installation process:
- Extract the zip file with WordPress installation and copy by using FTP into the root folder of your website
- Copy wp-config-sample.php file and rename it into wp-config.php (It is always a good idea to have a blank backup copy)
- Open wp-config.php file with a text editor and change the following parameters:
- 'database_name_here’‘username_here’
- ‘username_here’‘password_here’
- ‘password_here’‘localhost’
- ‘localhost’ – replace it with the name of your site or leave it as localhost if you plan to have WordPress locally
- Save the wp-config.php file (if you made changes locally you may want to upload this file to your web server to overwrite old settings).
Example of wp-config.php file content:
<?php
/**
 * The base configuration for WordPress
 *
 * The wp-config.php creation script uses this file during the
 * installation. You don't have to use the web site, you can
 * copy this file to "wp-config.php" and fill in the values.
 *
 * This file contains the following configurations:
 *
 * * MySQL settings
 * * Secret keys
 * * Database table prefix
 * * ABSPATH
 *
 * @link https://codex.wordpress.org/Editing_wp-config.php
 *
 * @package WordPress
 */

// ** MySQL settings - You can get this info from your web host ** //
/** The name of the database for WordPress */
define('DB_NAME', 'database_name_here');

/** MySQL database username */
define('DB_USER', 'username_here');

/** MySQL database password */
define('DB_PASSWORD', 'password_here');

/** MySQL hostname */
define('DB_HOST', 'localhost');

/** Database Charset to use in creating database tables. */
define('DB_CHARSET', 'utf8');

/** The Database Collate type. Don't change this if in doubt. */
define('DB_COLLATE', '');
Now it is time to launch WordPress installation:
- Open your browser and enter the address http://yoursitename.com/wp-admin/install.php
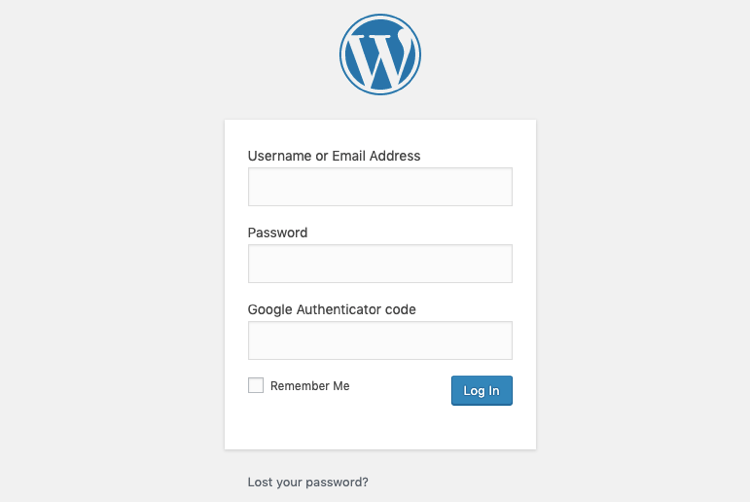
Run through the installation process by specifying details like site name, username, and password - Congratulations! You have successfully installed your WordPress website. You can now login into your site via http://yoursitename.com/wp-admin/
Conclusions
We are happy to see you at the start of your WordPress journey. Once you've successfully finished installing WordPress, you can follow our next tutorials:
And, don't forget to get Visual Composer to make the experience even better! It's intuitive and has a variety of different content elements, pre-made templates & addons that help create beautiful websites in the fastest way possible ⬇️

great post thank you for your valuable information
Thank you for this tutorial. I was able to install WordPress locally and through my web hosting service. I am now able to create a beautiful website for my business.